Lower-Fat Satay Curry 🍛

I started off with every intention to make a stir-fry but the can of coconut milk lurking in the cupboard wanted otherwise.


This recipe is an amended version of this Chicken Satay, the difference would be in the marinating of the chicken and addition of red peppers (which was a sublime addition by the way).


Ingredients:
500g Chicken Breast (sliced thinly or cubed)
1 Tbsp Garam Masala
1 Tbsp Turmeric
1 Tbsp Garlic Powder
Drizzle of olive oil
1 Chicken stock cube
Large red pepper
1 Can of light coconut milk
3/4 Cup peanut powder
Salt to taste

Method:
In a bowl add chicken, garam, turmeric, garlic, olive oil, 1/2 crumbled stock cube and a sprinkle of salt and massage it all into the chicken pieces using your hands. Set aside.

Prepare two pans with a drizzle of olive oil, one will be for chicken which will need to be large and the other is to make your red peppers separately.

Slice the red pepper into thin strips and cook in a pan on medium-high heat with the other half of the stock cube.

Heat up larger pan until hot and cook chicken on medium-high heat until chicken has cooked over (and you can’t see any pink bits), pour in coconut milk and peanut powder and reduce heat to a simmer.

Once your red peppers have softened (I let them brown a bit, until they were a bit chargrilled) you can fold them into chicken curry.

Leave simmering for approx 10 mins.

Serve with rice, quinoa or some salad – delicious either way! The sauce is to die for and we even grabbed some bread to dip in the sauce… mmmm.


Hope you enjoy it! Don’t forget to share it with me, I love to see you making these recipes 🙂

Don’t forget to like and subscribe to this blog and receive all recipes direct to your inbox OR you can follow me on instagram for all things foodie.

Easy Chia Pudding

Chia seeds are jam packed with nutrients so imma add them to everything and nobody is gonna tell me otherwise.

Seriously though, chia seeds are the powerhouse of the seed family: packed with antioxidants, fibre, protein and omega-3’s… you really can’t go wrong by adding them to your diet. For me, they really help with regulating my digestion and I won’t go a day without having them – mostly adding them to porridge and yoghurt.

Chia seeds are one of the most fibre dense foods available, specifically soluble fibre. What does this mean? In the same way that chia seeds create a gel when mixed with water, the same process happens in your digestive system; they absorb water to form a gel and in turn soften stools for easier passage.

Anyway, heres the recipe – give your body the love it deserves:

Ingredients:
160g Non-fat greek yoghurt (I used Fage brand)
2 Tbsp unsweetened almond milk
1 Tbsp chia seeds
Flavour drops of choice or vanilla extract
+ toppings of choice

Method:
Not much to it, just mix it all together until combined (without toppings), pour into a glass or bowl and refrigerate for an hour (or until you can turn the bowl/glass upside down without it falling out).

Then, top with what you like 🙂


I topped mine with some Malt-ish crumbles, sugar-free chocolate hazelnut spread and strawberries 😍


Hope you enjoyed this recipe, don’t forget to follow the blog to receive updates directly to your inbox or you can follow me on Instagram for all things foodie.


Cheesecake-filled Easter eggs 🐣

Easter eggs but make them macro-friendly.

Easter eggs isn’t the problem, eating them in moderation is. I just want the whole egg. You know? So, with these homemade ones i can at least eat the whole egg and its still within ‘moderation’ hehe plus they look super cute AND a higher in protein.

Heres how:
100g Chocolate of choice
1/4 Tsp coconut oil
200g Light soft cheese*
10g Low-Sugar chocolate hazelnut spread
20g Whey protein powder – choc flavour
4 Drops of hazelnut flavdrops
2 Drops of white choc flavdrops
+ toppings of choice

*The lightest option available is Philadelphia brand ‘lightest’ however I used generic supermarket branded soft cheese.

To make a vegan egg alternative, use vegan cheese spread (any brand will work) and the best protein powder I would recommend is choc soy protein, like this one.


Note: if you don’t have the flavdrops don’t worry it won’t change the texture of this recipe just the taste. You can add more hazelnut spread for authentic ‘bueno’ taste or you can just add any essence/ flavouring drops to sweeten.


Method:
Melt chocolate with the tiny bit of coconut oil – I do this in microwave but if you don’t have a microwave place chocolate and coconut oil in a glass bowl over a saucepan with boiling water. Some chocolate brands won’t require using coconut oil, but others might be thicker and need a bit of oil for it to spread easier.

Using an easter silicone mold, spread a layer of chocolate into each cavity and freeze a couple of minutes until solidified.

In a bowl, mix together remaining ingredients and whisk until well combined. Pour into your chocolate egg shells (still in mold) and refrigerate 15-20minutes.


Lastly, top with whatever you like – I used Malt-ish crumbles, strawberries and a cheeky white choko bon. Like having an easter egg and delicious dessert rolled into one, with the added bonus of each egg coming to approx 260 cals (inc toppings).


Hope you enjoyed this recipe and don’t forget to follow this blog to receive updates directly to your inbox or follow me on Instagram for all things foodie 😊

Get discounts on IHerb with my code (multiple use) : JCB887

Recipe: Sweet Pizza 🍓

Idk, its like a pizza pero sweet.


Halfway into making breakfast muffins for my boyfriend I realised I didn’t have a muffin tray to bake them in and so, sweet pizza was born. Honestly, it felt like the most fitting description.

Made with oat flour, whey and egg – a simple and versatile recipe which you can make when you fancy something cakey, can prep in advance or even make into muffins (like i failed to do).


Heres the recipe:


Ingredients:
1 Cup oat flour (or ground oats)
1 Scoop whey protein*
1 Tsp baking soda
1/2 Cup oat milk (or milk of choice)
1 Egg (or 2x egg whites)
1/4 Cup maple zero syrup
1 Tsp vanilla
1 Tbsp agave nectar
*You can omit this completely, however the whey protein will give it a sweeter flavour so you will want to add some more sweetener – I would recommend a powdered stevia or xylitol).

Method:

Pre-heat oven to 170 Degrees C.

Chuck all your ingredients in a bowl and mix until well combined.

Line a round tray (I only had one size which is approx 10inch) with greaseproof baking paper and pour your mix into it. Spread to the edges with a spatula – it should spread enough.

Sprinkle choc chips into batter (optional).

Bake for approx 10mins, until baked through the centre.

Remove from oven… I would say leave to cool, but is anyone ever patient enough to do that? Melted chocolate chips > not melted chocolate chips. YGM?

Spread your desired toppings; I used peanut butter, strawberries and white choc drizzle.


Yields 4 slices and approximately per slice (no toppings) was: 162 cals | 3.2F | 17.4C | 11P however macros may vary depending on brands and measurements each person uses.


Hope you liked this recipe, follow the blog to receive blogposts directly to your inbox OR you can follow me on instagram for recipes, reels and nonsense 😛


5% discount on iHerb using code: JCB887 (multiple use code).

Recipe: Chicken ‘kebab’ with potato wedges + yoghurt sauce 🥘

I was asked to participate in a local TV show which involved trying (and in my case re-creating) typical takeout foods. Say yes, regret later.


The programme consists of judging local takeaway eateries and then a guest chef re-creates a healthier alternative. Each week has a different theme and a different guest chef; I was hoping for pizza but alas I got kebab week. Nonetheless I was up for the challenge and did my own take on a kebab by doing a chicken edit with homemade oven-baked potato wedges + yoghurt sauce.


Join me in making this re-creation and follow these easy steps:


MARINATING THE CHICKEN.

Usually I don’t really measure my ingredients when doing a recipe for the first time, I like to experiment freely and then re-work the measurements after. But this one worked so well, I want to guide you through everything I used. Feel free to add more (or less) of any of the ingredients as you prefer.

3 Large chicken breasts, sliced lengthways*
1/4 Cup olive oil
3-4 Tbsp smoked paprika
3-4 Tbsp bbq seasoning
1/4 Tsp Cayenne or chilli powder
3-4 Tbsp Garlic Powder
2-3 Tbsp italian herb seasoning
salt to taste

Toss it all in a bowl, rub all the herbs and spices into the chicken breasts – use your hands and get messy. Then, set aside and leave marinating while you prepare potato wedges.

Tip: marinating in advance gives the chicken more flavour. You can also use chicken thighs for a more authentic chicken kebab flavour as thighs tend to have a higher fat content and will add a bit more flavour to the skewers.


LETS MAKE POTATO WEDGES.

First, turn oven on and set to 170-180 degrees C then get these ingredients:

1 Jar of cooked potatoes (400g drained)
2 Tbsp garlic granules
1 tbsp italian seasoning
Drizzle of olive oil
salt to taste

Slice potatoes into wedges, and marinate them with your remaining ingredients – again use your hands (its the best way). Line a baking tray with greaseproof baking paper and lay your wedges onto them without any overlapping. Set aside.

Tip: Did you know that cooked potatoes sold in jars have better calorie and carb content than normal cooked potato? Don’t believe us? Check it out for yourself! The brand that we used here, in comparison to normal cooked potatoes was HALF the carbs per 200g. HELLO POTATO PARTY.


PREPARE THE CHICKEN KEBABS.

Grab some skewers, I used metal ones but the wooden ones will be fine just make sure you soak them in water beforehand so that they don’t burn in the oven. Then ‘needle’ the skewer through each piece of breast and place over a deep dish like so:


COOKING TIME

Place the wedges on a higher tray of the oven and chicken on a lower tray as you don’t want your chicken to burn before it cooks. Cook in the oven for approximately 40 minutes. However, halfway through you will need to swap chicken to a higher level – when you do this pour the juices that have fallen into the tray over the chicken. If there isn’t much there, then pour a drizzle of olive oil and place back into oven, on a higher tray.

Note: the chicken might create some smoke so be wary of this when you open the oven (especially if the smoke detector is right above it like mine – oops).


DONT FORGET THE SAUCE

While the chicken and wedges are cooking, prepare the sauce:

100g Non-fat greek yoghurt or queso batido desnatado
Drizzle olive oil
1 Tbsp agave nectar (or honey)
1 Tbsp garlic granules
1 Tbsp italian herbs
1 Tsp cider vinegar or lemon
salt to taste

Whisk it all together until combined and done. Set aside.


TIME TO EAT.

Once chicken and wedges are ready, remove from oven.


With a tea towel grab the end of the skewer and using a serated knife – slice chicken downwards. Transfer onto plate, add potato wedges, yoghurt sauce and side salad. Or for the TV show I made them into wraps – delicious any way you prefer it!

Hope you enjoy this recipe, or if you watched me on the show… hope you enjoyed my awkwardness – at least the mask covered the one spot that decided to make an appearance the day before.

Check out the blog for many more recipes, follow and receive them direct to your inbox OR follow me on instagram for more recipes, videos and nonsense 🙂

You can watch the show here.

Recipe: Peanut Pancakes 🥜

10pm is a great time to make yourself pancakes, right?


After eating light all day, 10pm came along and I was hungry – cue pancakes. As with most recipes, i chucked loads of ingredients in a bowl and hoped for the best.


This was the outcome:


Ingredients:
6 Tbsp peanut powder
(They also sell this one in Morrisons)
20g Whey protein powder
(I recommend the one in shopping list below OR this one by Bulk)
2 Tbsp xylitol (or granulated sweetener of choice)
30g Ready Brek porridge oats
1 Tsp baking powder
Pinch of salt
3 (L) egg whites
3 Tbsp milk of choice


Shopping list here.


Method: Just like I did, chuck it all in a bowl and mix until everything is combined.

Leave your mix to a side (let the oats and peanut powder soak in) and heat a non-stick pan to medium heat. Be patient and wait for it to properly heat up, don’t be tempted to increase heat because this is just going to burn your pancakes. Trust.

Then, using a low-cal spray oil, make your pancakes. Pour table-spoonfuls of mix onto pan – leave to cook several minutes and flip. Repeat for entire mix.


Stack them up and enjoy! With some ‘Better than Snickers Spread’ maybe? I added some berries too! How will you have yours?
Hope you enjoy them, don’t forget to tag/share if you make them 🙂

Exclusive discount on iherb with code: JCB887

How to: Pizza Omelette 🍕

You had me at pizza.

Pizza is often seen as a taboo food item, comprised of all the ingredients that are seemingly seen as ‘bad’. But, is pizza bad? Not really. Eaten in moderation, it can be enjoyed as part of a balanced diet but the problem lies in understanding how to include this delicacy as part of your intake.

For me, its hard to include a whole pizza into my daily calorific needs unless i don’t eat much all day which is VERY unlikely because i like to eat regularly throughout the day. So, this really takes away those pizza cravings without the added calories (or guilt).

If this is you too, then heres how to:

1. Prepare your base.

You can make your base with egg whites (as i did) or with eggs like you would a normal omelette. I just choose to do it with egg whites only (because I would much rather have all the fat content from cheese).

In an oven-safe pan make your omelette, leave it cooking on medium heat until cooked through without flipping it over. Then remove from heat and move to step 2.

2. Choose your sauce.

Here we used some Biona Passata sauce which we had left over from some pasta but i like using tomato puree or zero bbq sauce (when i don’t fancy tomato). There is no wrong way about it, just use whatever you like and get creative!

Pour the sauce over your omelette base, and before you move to step 3… pre-heat oven to 180 Degrees C.

3. Topping time!

We used fresh spinach leaves, turkey slices and cheddar but you can make any variation you like. The only thing you have to be wary of is the cheese! Its easy to overdo it so make sure you weight out a decent portion rather than loading it on. This was just 40g grated cheddar and it was more than enough. I prefer using Mozzarella, it melts better and imo, is much nicer + has a better nutritional content… but we were out and had to improvise.


Pack your toppings onto the sauced omelette base and proceed to step 4.

4. Bake it!

Now, this part might get you by surprise but you’ll need to bake it in the pan! Yes, just as it is… put the pan with your ready made pizza omelette and bake until your cheese is deliciously melted and golden.

5. ENJOY!

You’ll have to wait for it too cool a little bit, then transfer onto a plate and BOOM, omelette pizza. Ready to satisfy your cravings!


Honestly, don’t diss this recipe until you try it! Everyone who has tried it, has loved it – especially as it means you can enjoy ‘pizza’ more often than not.


Heres the exact recipe:

Ingredients:
200g Egg whites (approx 5-6 egg whites)*
40g Tomato passata
100g turkey slices (chopped)
30g Spinach leaves (chopped)
40g Light Cheddar cheese
1 Tsp oregano
1 Tsp olive oil
Sprinkle of salt

*I hadn’t had much protein all day and needed to make up for it so packed on the egg whites, you don’t need to use this much.

Method:
Add olive oil to a med-large pan and heat on med heat.

Once oil is hot, add egg whites and leave to cook as mentioned in STEP 1.

Pre-heat oven to 180 Degrees C. Add sauce to omelette base, then toppings, oregano and salt. Alternatively you can add the salt to the omelette while cooking.

Bake in oven (in the pan) until cheese melts and is deliciously golden.


The beauty of this recipe is that you can get really creative and make it suit your exact taste preferences – no matter how wild.

Don’t forget to tag or share. We love to see 🙂

Get exclusive discounts on iherb using code: JCB887

Follow me on instagram for more recipes, videos and nonsense.

Recipe: Carrot & Apple Cake 🥕

It was a rainy day and i REALLY fancied something heartwarming, with lots of cinnamon and apples – to enjoy with a frothy coffee and the sound of the rain. Unsure whether to make pancakes or cake, i handed the decision making to my boyfriend and (obviously) he chose cake.


Im glad that he did though because its one of the most delicious cakes I have made to date and that says a lot coming from someone who’s profession is baking! Hope you enjoy this recipe:


Ingredients:
2 Small/medium apples (cubed)
160g Rye flour
40g Vegan protein powder*
250g Carrots (frozen is also fine)
1 Banana (mashed)
3 Egg whites
1/4 Cup light olive oil
50g Brown sugar (or coconut sugar)
50g Xylitol
2 Tbsp Cinnamon
+ a bit of grated carrot (optional)
1/2 Tsp Baking powder
1/2 Tsp Baking soda
1 Tsp Cider vinegar
*I used this one by Bulkpowders in Apple Strudel flavour and it worked perfectly, however a vanilla flavour one will work well too. Alternatively, omit completely and add more flour.


I used brown sugar in this recipe because i like the taste it gives recipes like this (with cinnamon) but you can also sub for more xylitol/ any other granulated alternative. As for flour, i presume it could be done with oat flour if you don’t have/ can’t have rye, but I have not tried this myself – so can’t vouch for it.


Method:
First, you need to sautée apples. Do this by heating a pan on med-high heat (no oil) and add 1 tbsp cinnamon until apples soften, stirring apples over regularly.

Then, make your carrot puree. You can use ready made puree OR to make your own, boil carrots with water and then blend together in a Nutribullet or with a handheld blender. I made my puree a bit chunky as i like it with carrot pieces, but you can simply blend more or with more water for a smooth puree.

Preheat oven to 170-180 Degrees C.

Now, chuck all the remaining ingredients in a bowl and mix until well combined. Pour mix into a round 8inch baking tray and bake for 20-30 minutes (until a knife comes out clean when poked in centre).


Leave to cool completely before eating. Recipe yielded 8 slices.


We enjoyed it with a sprinkle of icing sugar and cream cheese frosting and it was absolutely delicious! We also shared it with some friends and they gave it raving reviews too!


Don’t forget to tag / share if you try this recipe, we love to see! 🙂

Recipe: ‘Bollycao’ Fit

I wish i had a whole essay as to why i decided to make these but i don’t, it started off with wanting to use up leftover xmas chocolates and escalated to stuffed protein rolls? muffins? bollycao fit?


Bollycao is a soft bread-like bun, filled with chocolate cream and is traditional to Spain – produced by Bimbo. However, due to our close proximity to Spain it’s a treat most of us (Gibraltarians) grew up with and loved!


Anyways, I hate recipes where you have to scroll for an eternity to get to the important bit so i won’t faf any longer:


Ingredients:
65g Ground oats or oat flour
1 Scoop Vanilla Whey (approx 30g)
2 Tbsp Xylitol
100g Non-fat greek yoghurt ( I used Fage 0% as its my fave)
1 Egg white (approx 40g)
1 Tsp Vanilla essence
1/4 Tsp baking powder
1/4 Tsp baking soda
Spread of choice (for filling)


Note: you can use any silicone mold of preference, I tried the same recipe in a dome mold, ice-cream mold (pictured) and muffin mold – and they all worked.


Method:
Preheat oven to 180 Degrees C.

In no specific order, chuck all the ingredients into a bowl and mix until well combined.

Grab your desired silicone mold of choice and using a small spoon, place a bit of mix in each fill and spread upwards against the sides. Place a teaspoon-full of chosen spread in the centre of each and cover with more mix, making sure all the spread is covered.


Bake for approximately 10mins (until the sides have started to brown).

Break open (while scalding your hands) to see the inside chocolate ooze out. OR just leave to cool and enjoy like a normal person. Upto you.

Yields approximately 6 pcs (depending on size of mold you use).


Head to @themusclebaker instagram, for a video reel on how to do this recipe or check out how to make your own macro-friendly spread here.


This was a second batch using the macro friendly spread recipe. It worked perfectly just not oozy as using an actual spread (like Nutella).

Don’t forget to tag / share if you try this recipe, we love to see! 🙂

World Vegan Day 🌼

Today is World Vegan Day, an annual event celebrated by Vegans all over the world. The event was established in 1994 by Louise Wallis, then Chair of The Vegan Society in the United Kingdom, to commemorate the 50th anniversary of the founding of the organisation and the coining of the terms “vegan” and “veganism”.


In the beginning, The Muscle Bakery wasn’t a reaction to any culinary changes but more of a personal development in the way I saw food. However, as my clientele developed and my skills improved, the demand began evolving and I was catering to the needs of my customers as well as developing my own cooking/ baking style.

The request for Vegan food has grown incredibly over the past few years, and even more so in the last year. When I began, my Vegan customers were a very select amount. But now it seems to be the other way around which is actually surreal to see; the way our culinary culture has changed.

With the growth of knowledge, we are all becoming more conscious of the world around us and it’s up to us to change that. So in contrast to when we began, we have developed with these changes, becoming an exclusively veggie friendly bakery.

We have also completely removed plastic bags and looking into veggie friendly packaging and labels.

We also offer a discount to all customers when they return their plastic containers or bring their own bags.


Everyone’s little efforts, make a big difference.


DID YOU KNOW:


A person showering for 2 months uses up the same amount of water that it takes to produce enough livestock for one beef burger.

Broccoli has a higher protein content per calorie than beef.

Every minute, 7 million pounds of excrement are produced by animals raised for food in the US.

Plastic is the only existing material that CANNOT break down naturally.

There is officially so much plastic in the world that any fish we eat, by default also contains plastic.

If every human skipped just ONE meal of chicken per week, environmental effects would be like removing 500,000 cars off the road.

82% of starving children live in countries where food is grown to feed animals in the west.

Brad Pitt, Beyoncé, Ellen Degeneres, Liam Hemsworth, Alicia Silverstone, Jennifer Lopez, Pamela Anderson, Alec Baldwin and Bill Clinton are vegans.


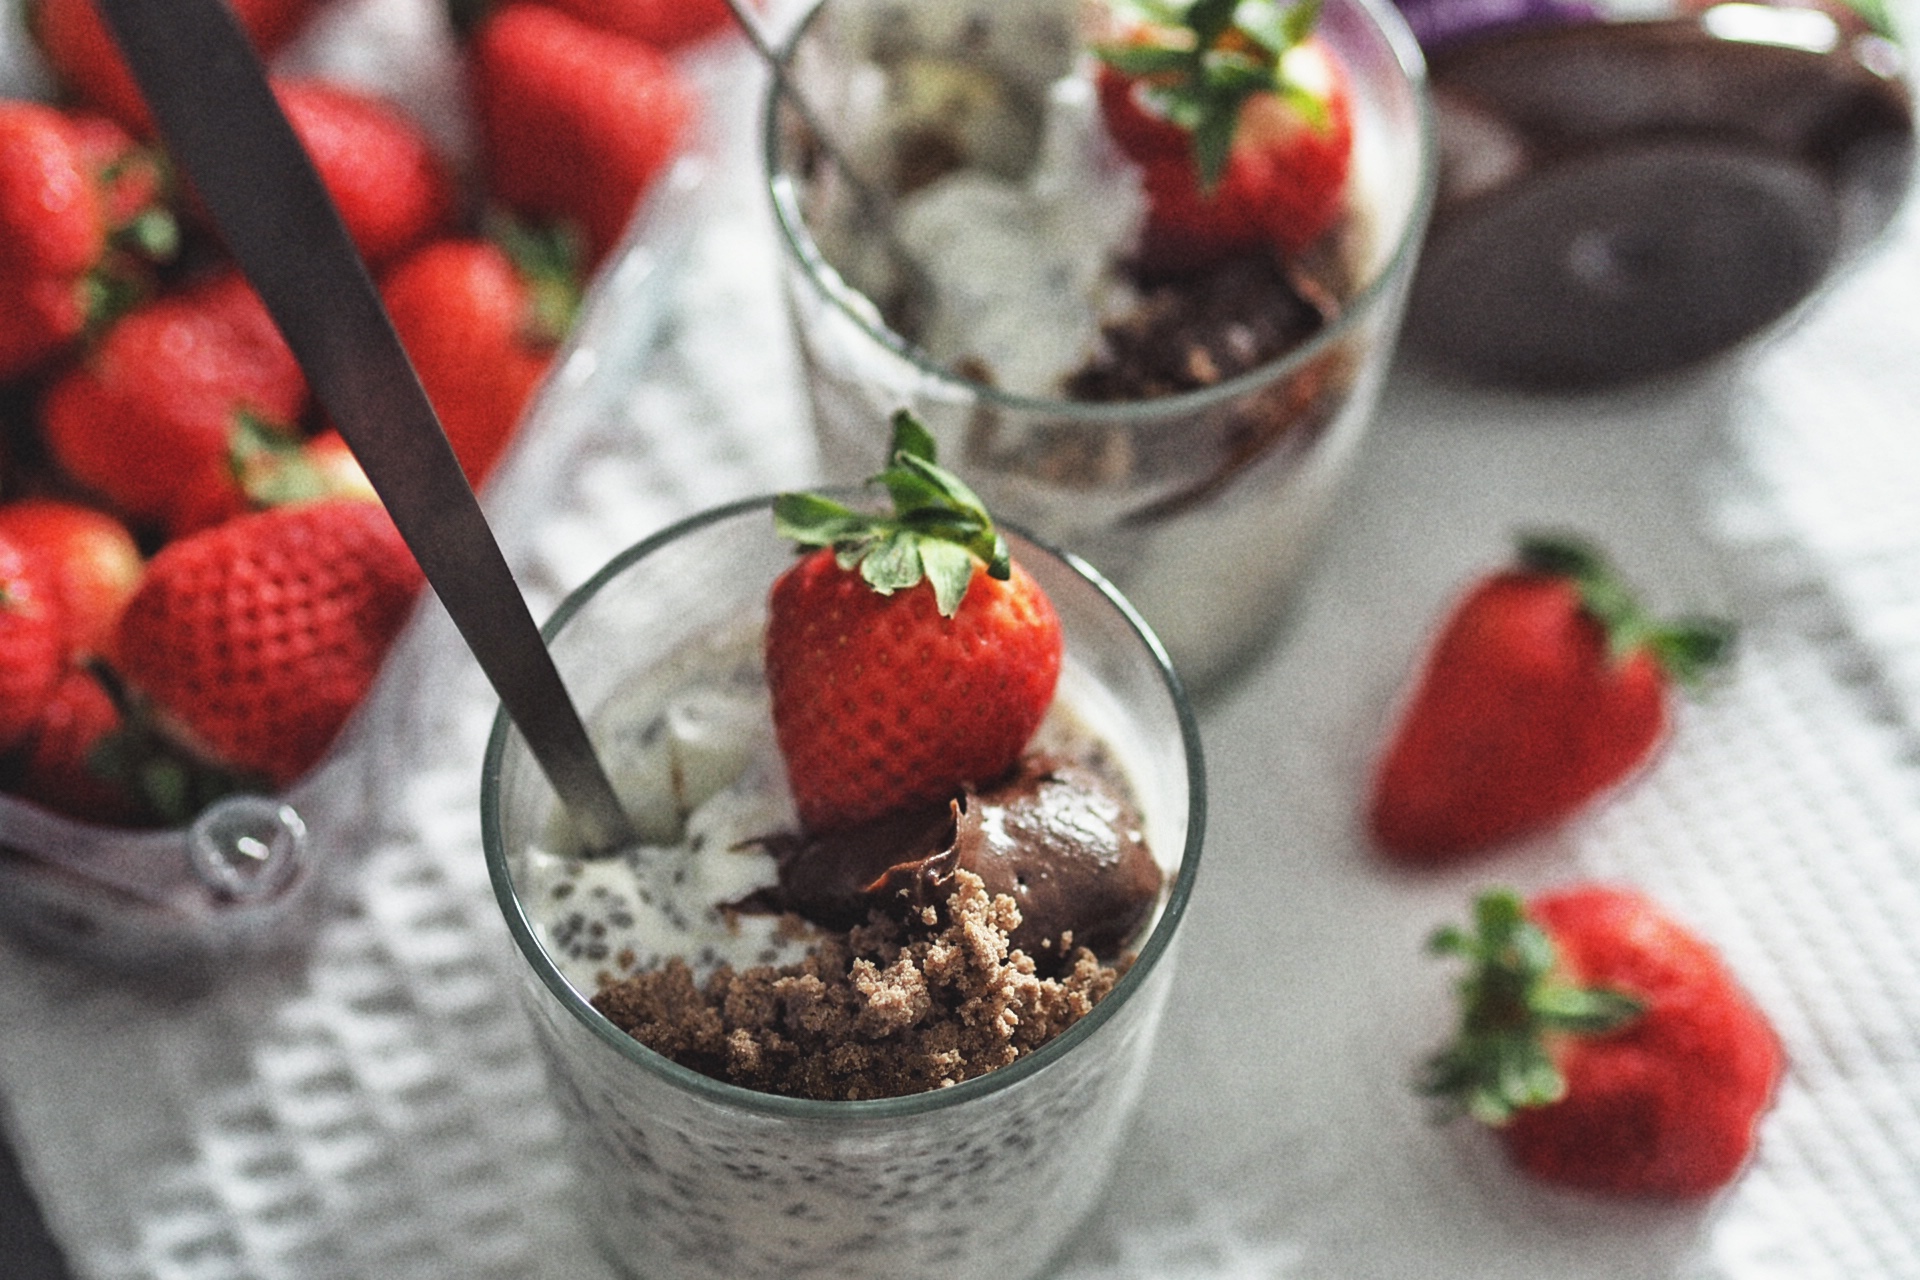
To celebrate this day, we have put together a collection of our best Vegan recipes to inspire you guys; to show that eating Vegan (& veggie) is also super fun and tasty (and not just about eating leaves and carrot sticks).


VANILLA WAFFLES

Vanilla Pancakes


Say yes to waffles with this tasty vanilla flavour waffle, topped with soy yoghurt, cookies, fresh berries and zero syrup.


BLUEBERRY SLICES


Imagine if you married up a cookie, a scone and a cake… this is what our Blueberry Slices are like.


COFFEE COCONUT TRUFFLES


Coffee and coconut? imma go and say yes my friends. Soft truffle centre made w/ coconut flour, infused with instant coffee and coated in luxurious dark chocolate.


CHOC BROWNIES


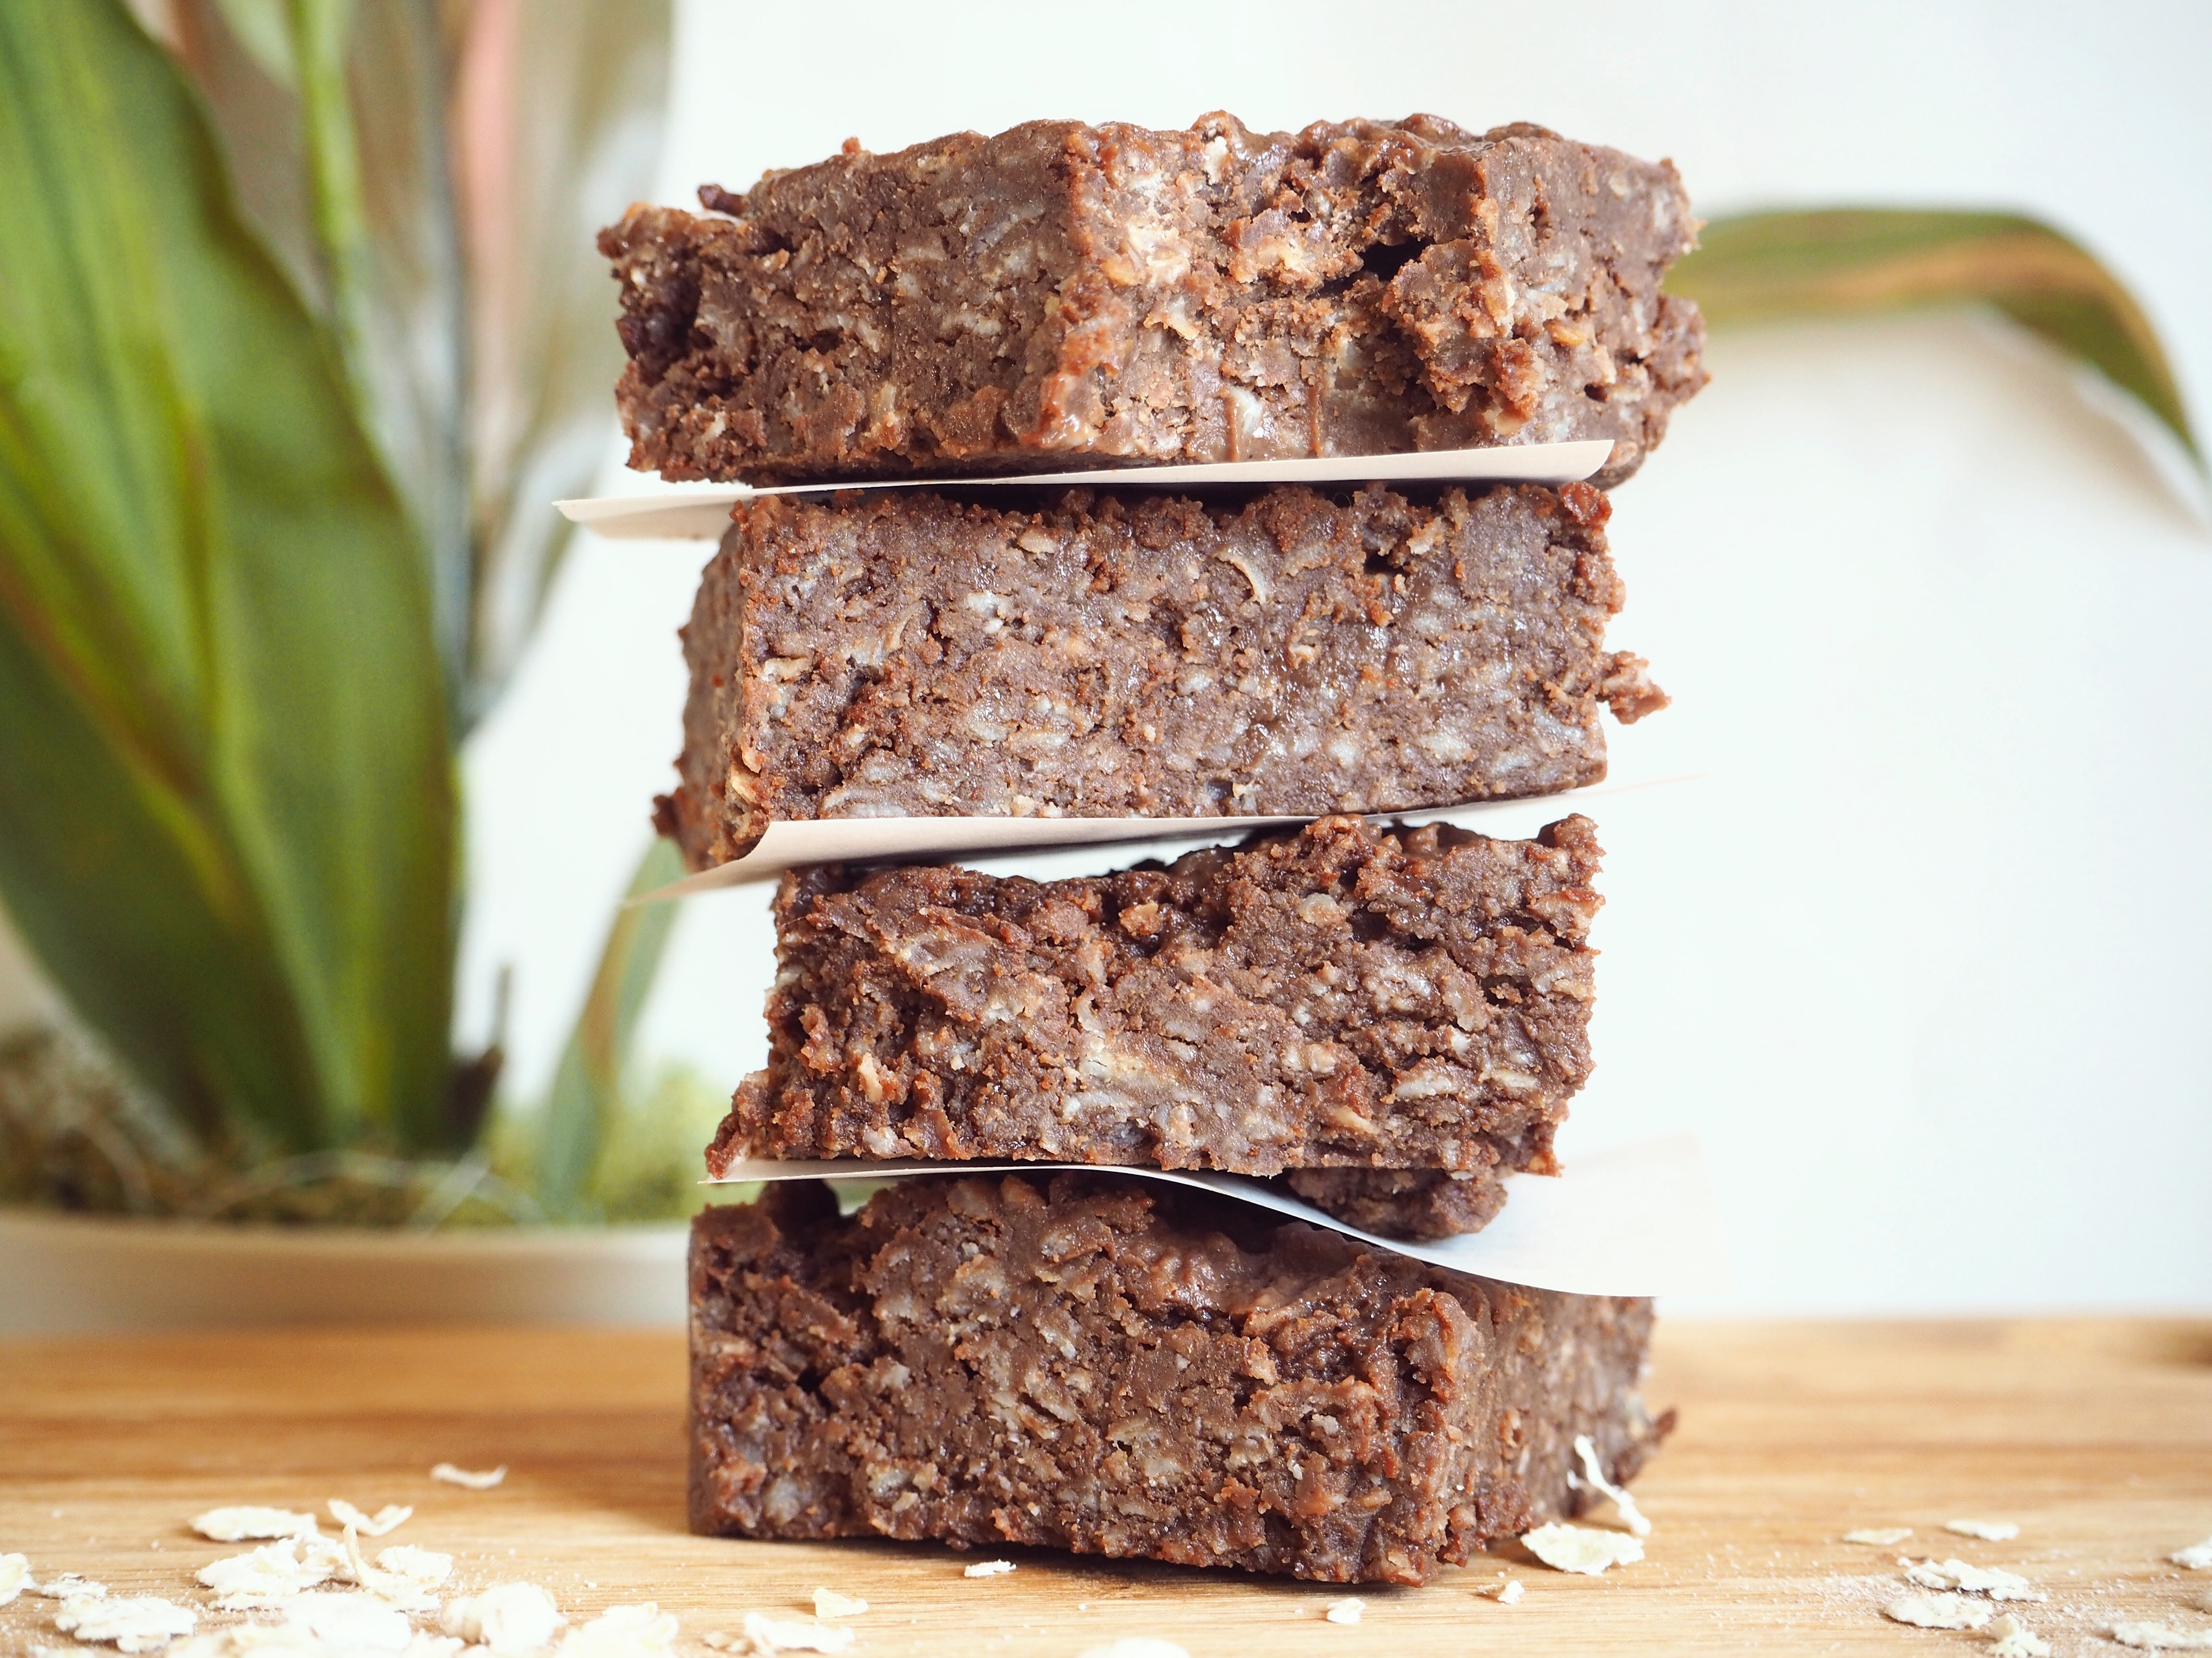
Fudgey brownies to brighten the day. Using Soy yogurt as a secret ingredient, a recipe to make over and over again.


CHEESY NACHOS


Cheesy nachos without the cheese? C’est pas posible. Thanks to the use of nutritional yeast, make any tortilla your b**tch and make them into badass nachos.


FLAPJACKS


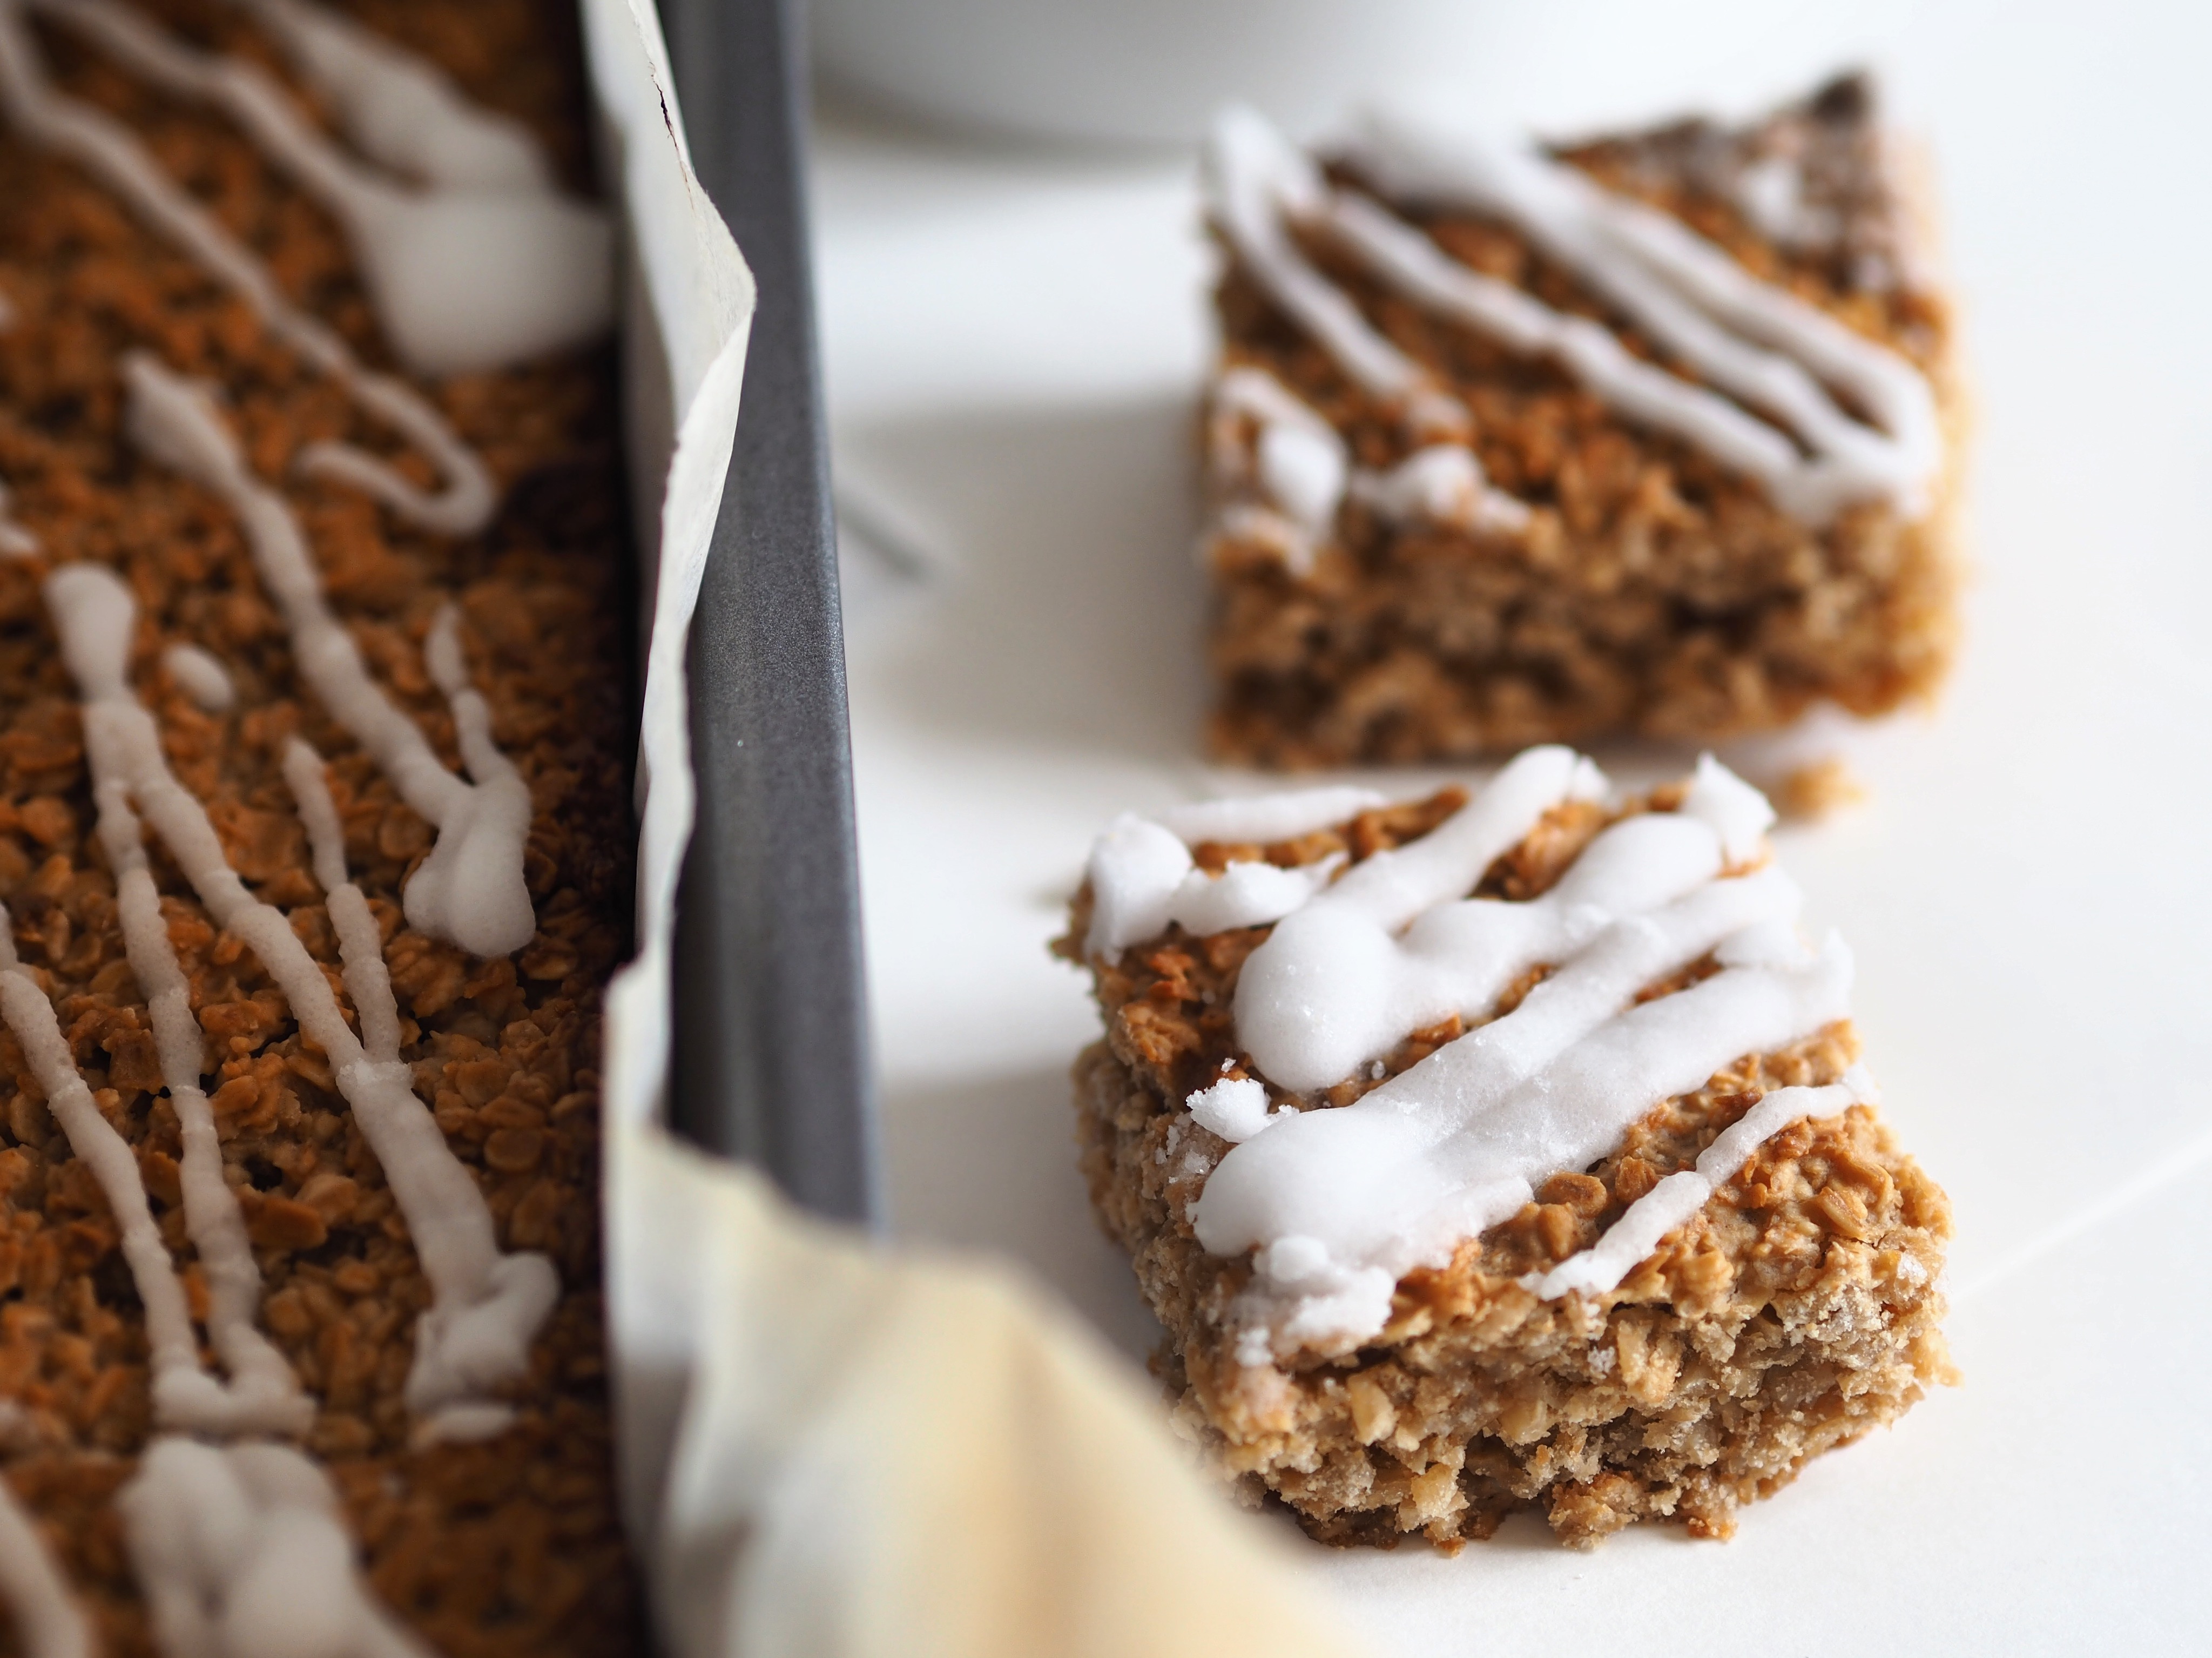
Flapjacks are usually laden with butter, not these tho. With added peanut butter… theres nothing to not love!


GOJI HOB NOBS

Goji Hob Nobs


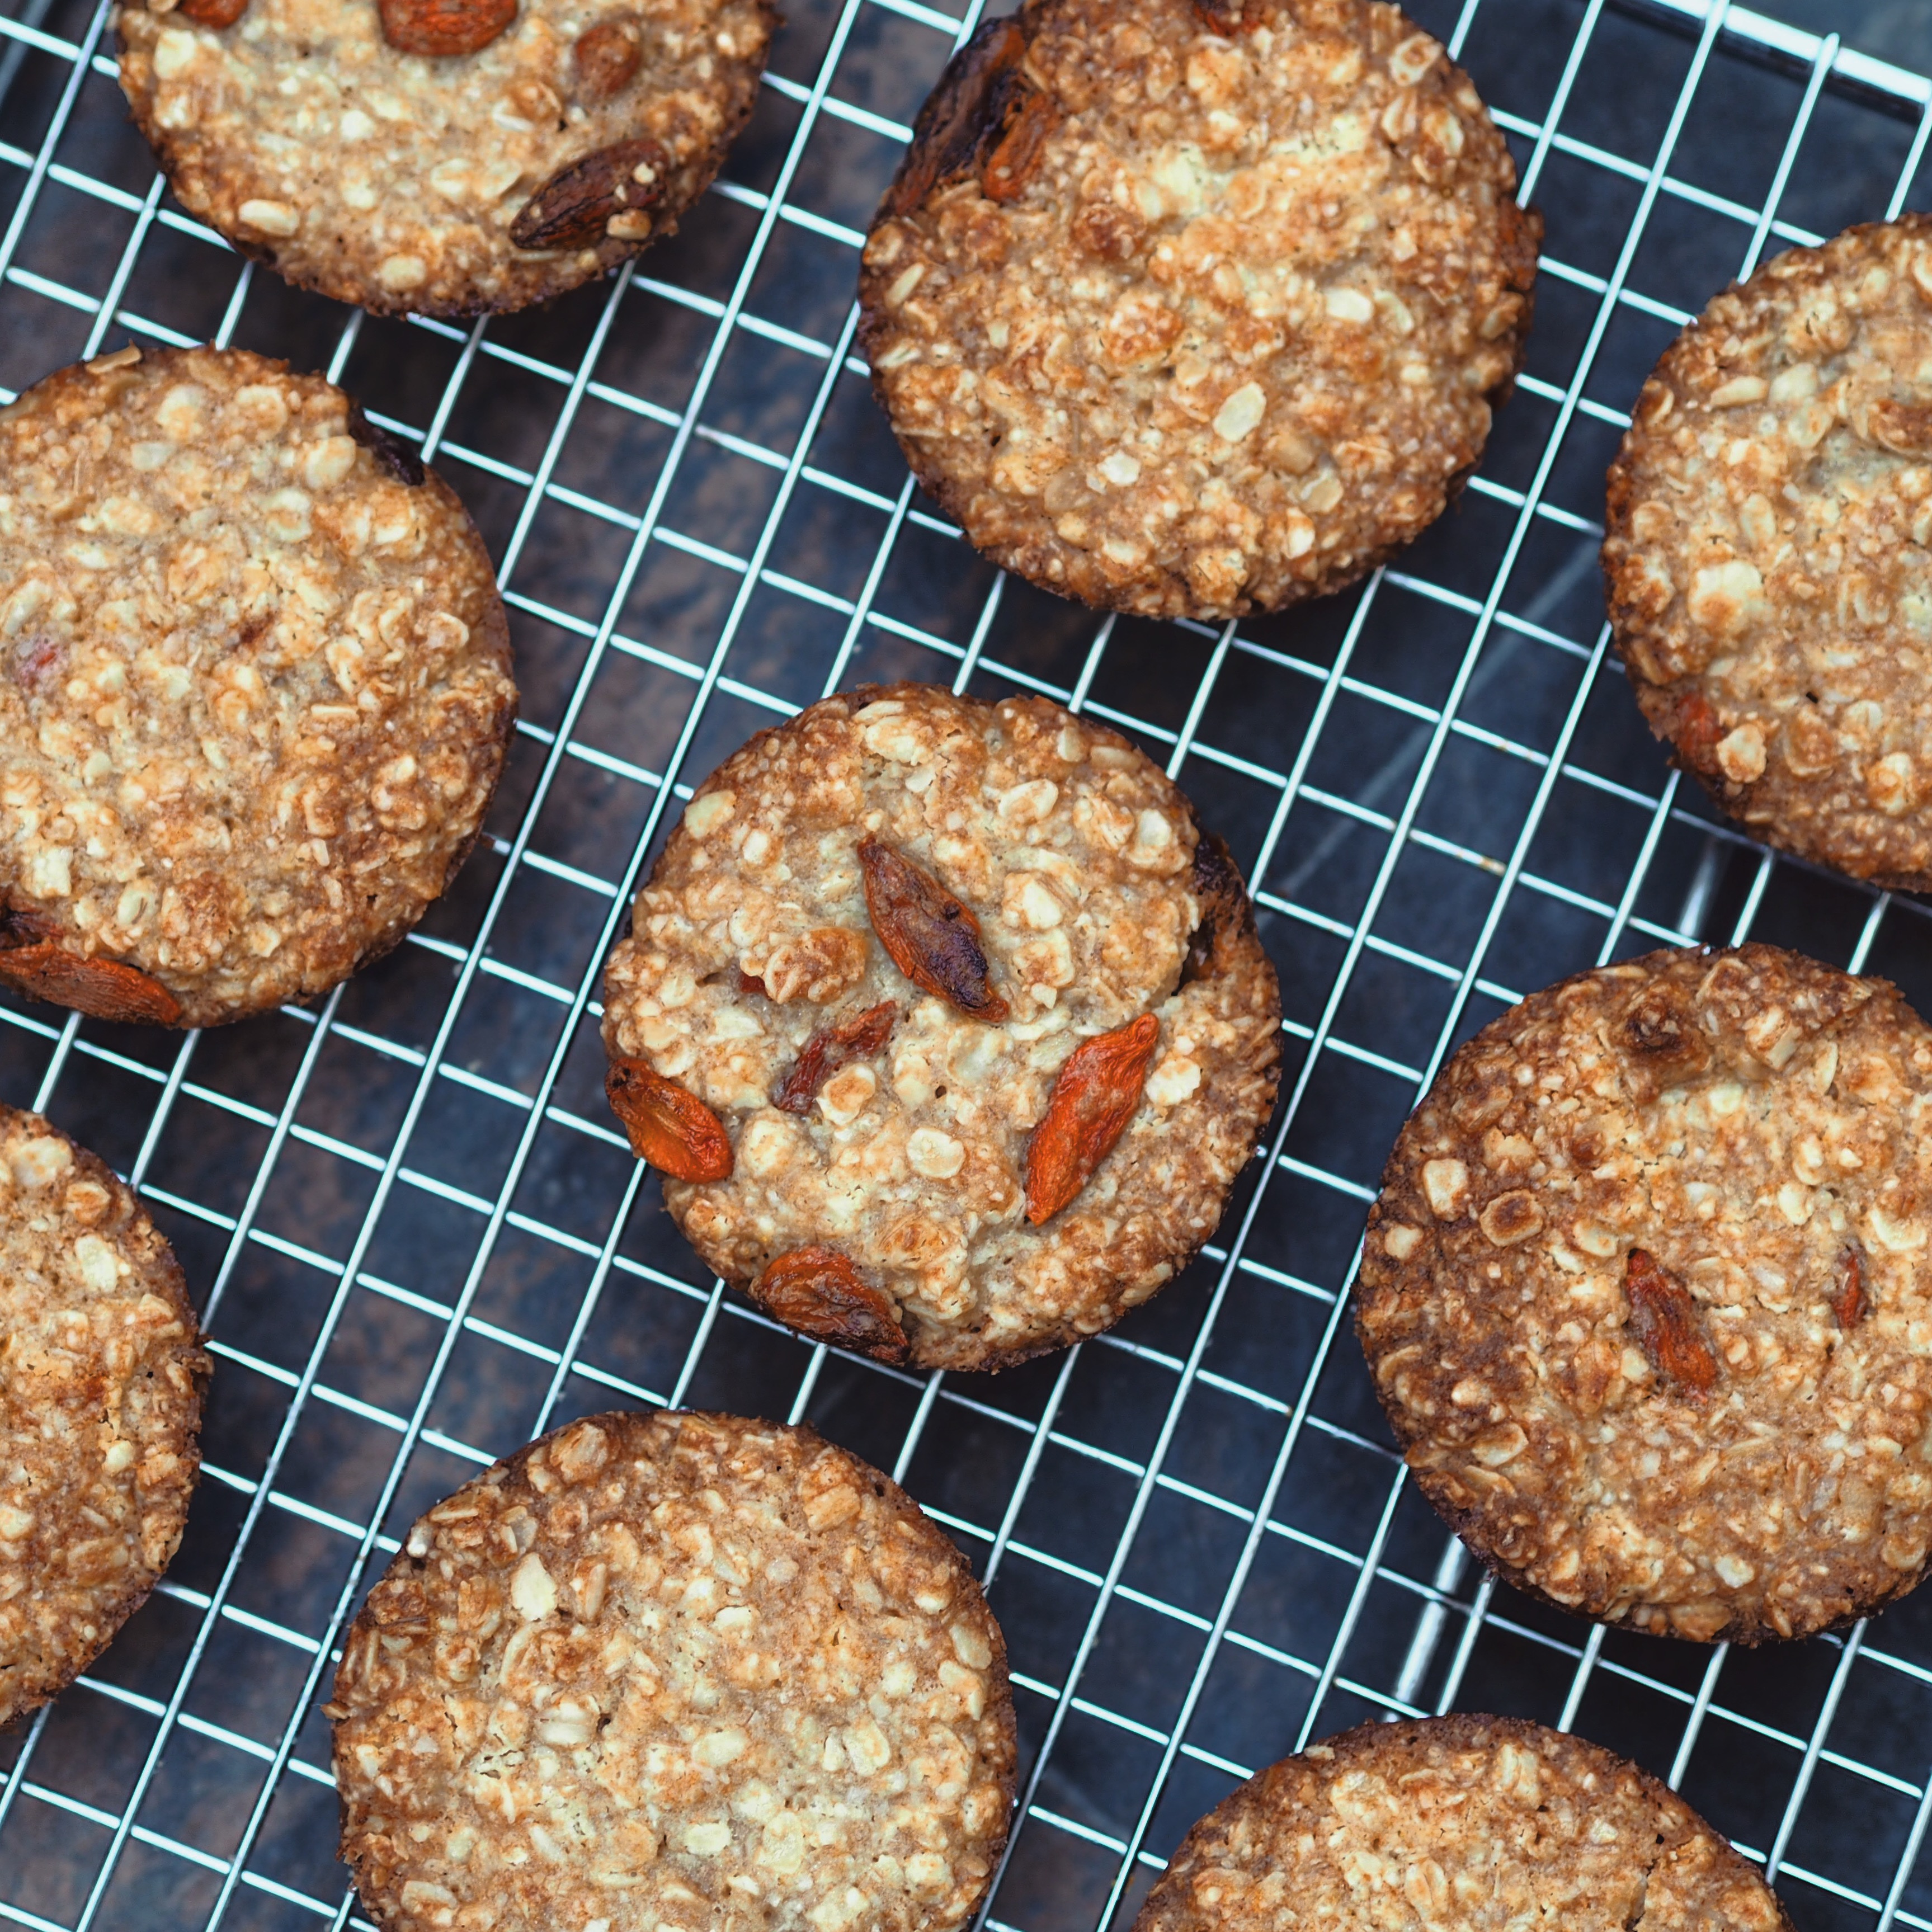
Hob Nobs minus the gluten and the buttah + added health from the goji berries. Give them a whirl.
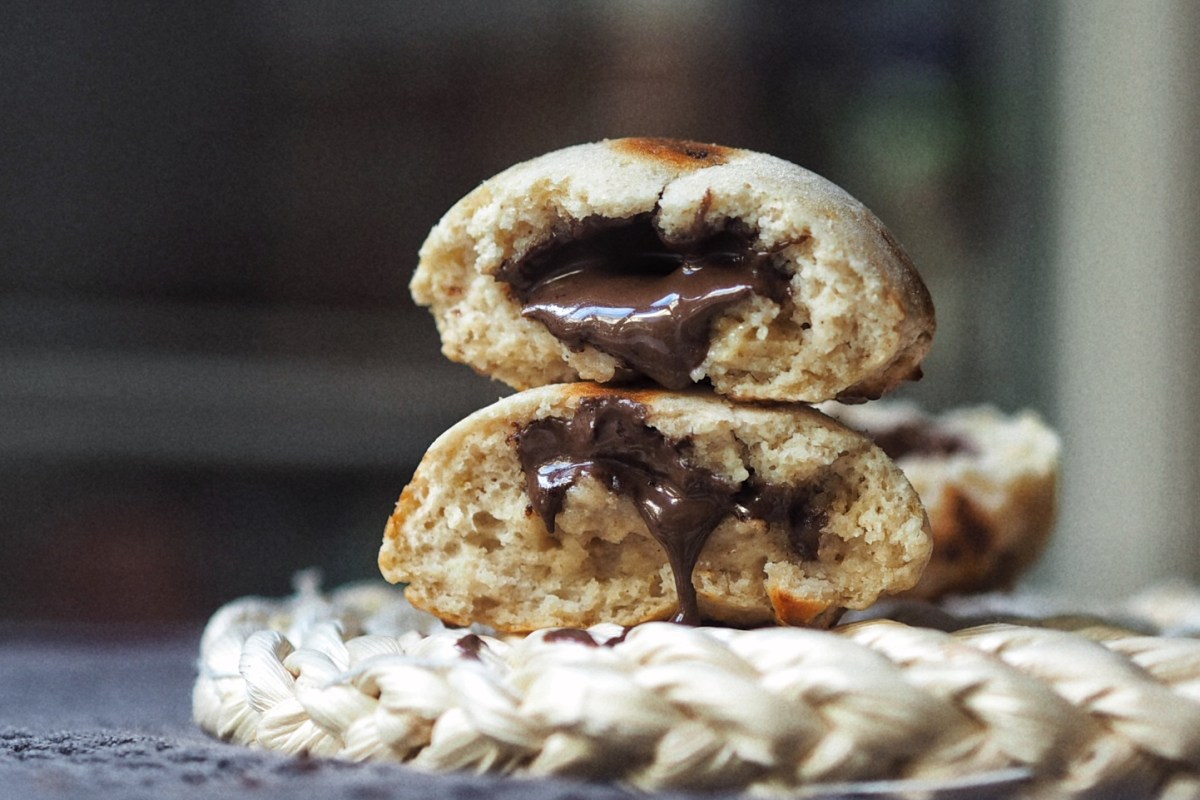
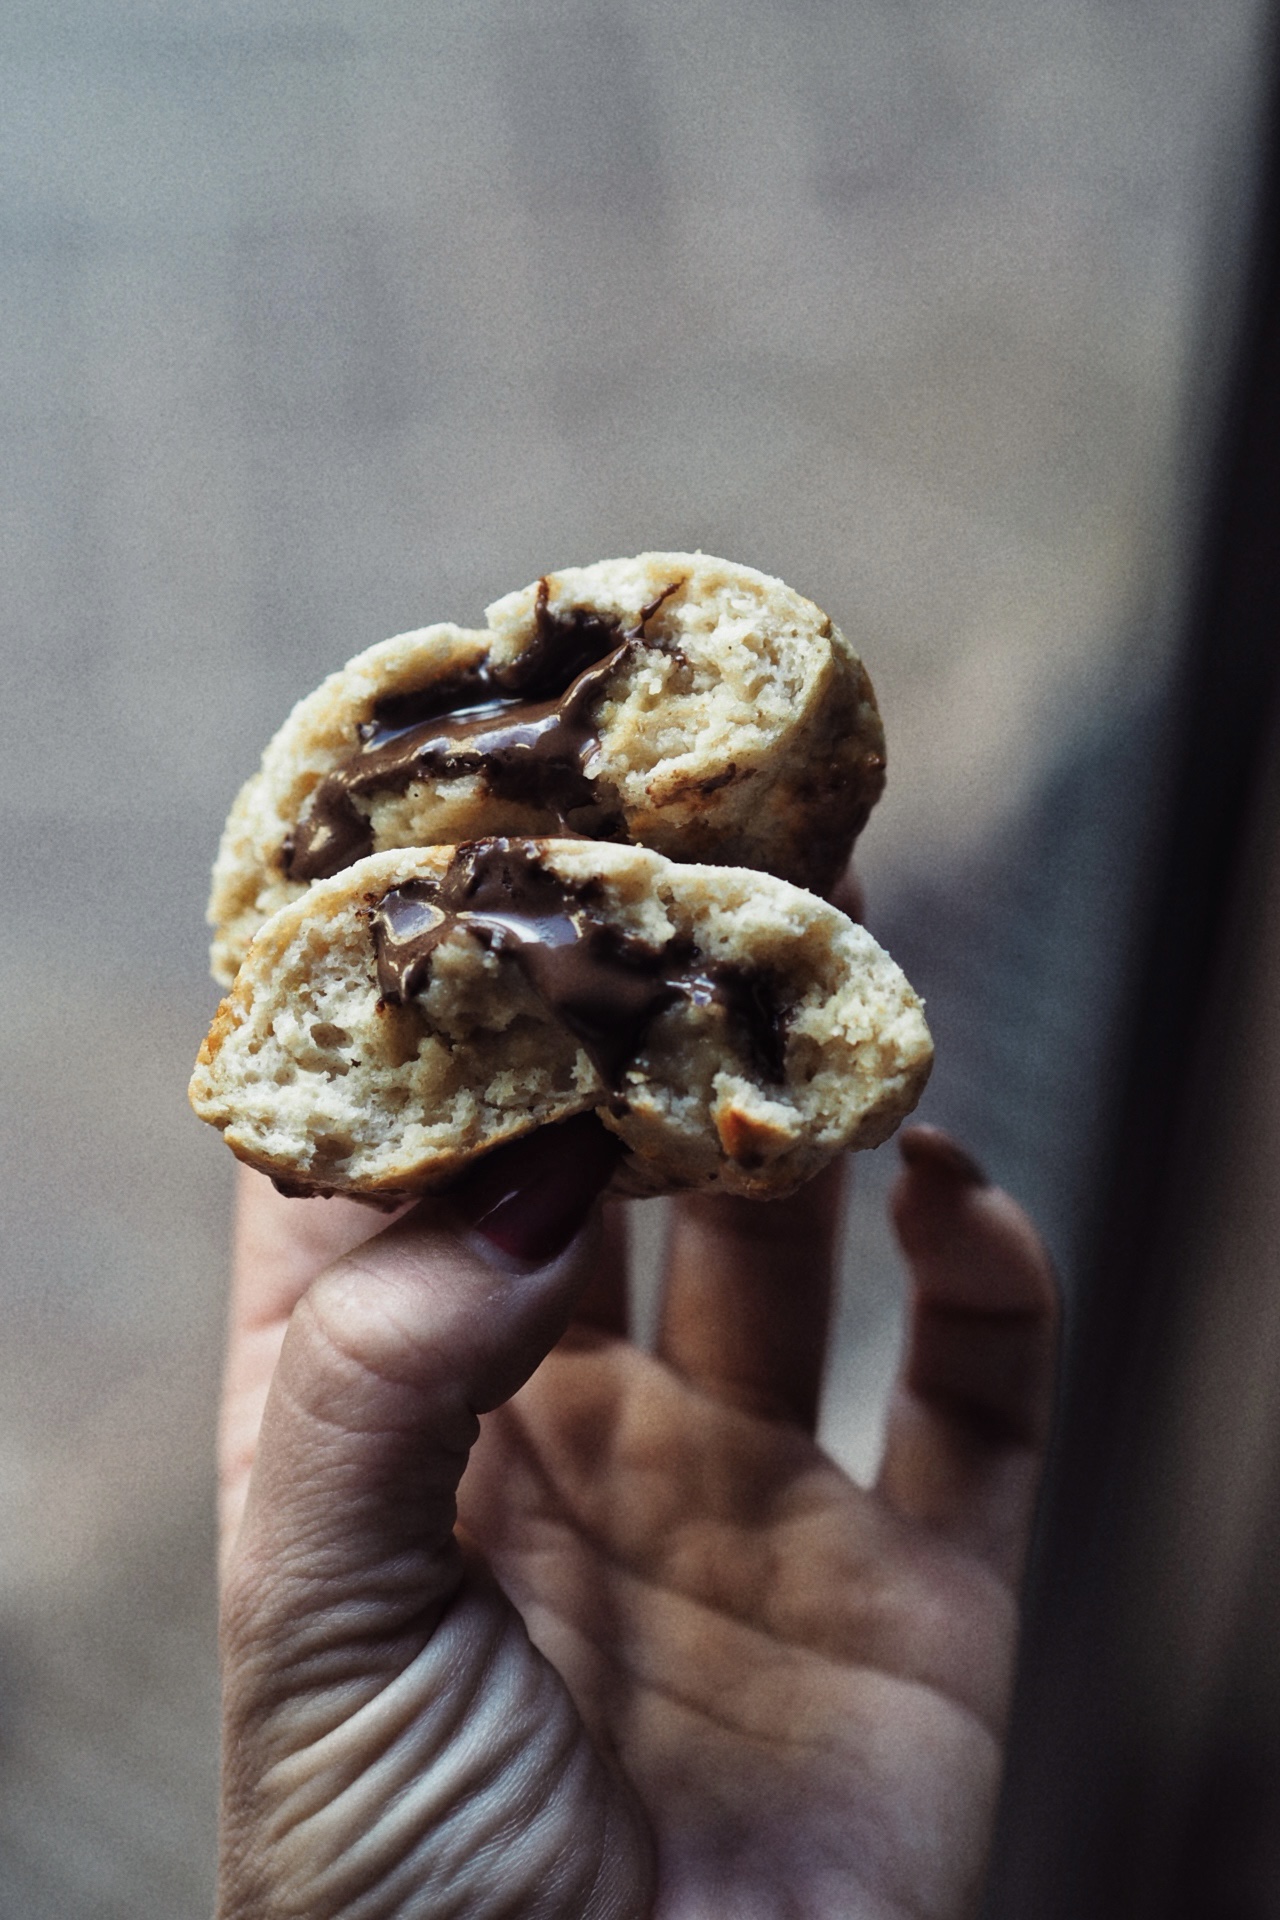

PROTEIN PANCAKES

protein pancakes


These pancakes are so tasty, it fooled all our non-vegan friends.


BBQ TOFU

bbq tofu


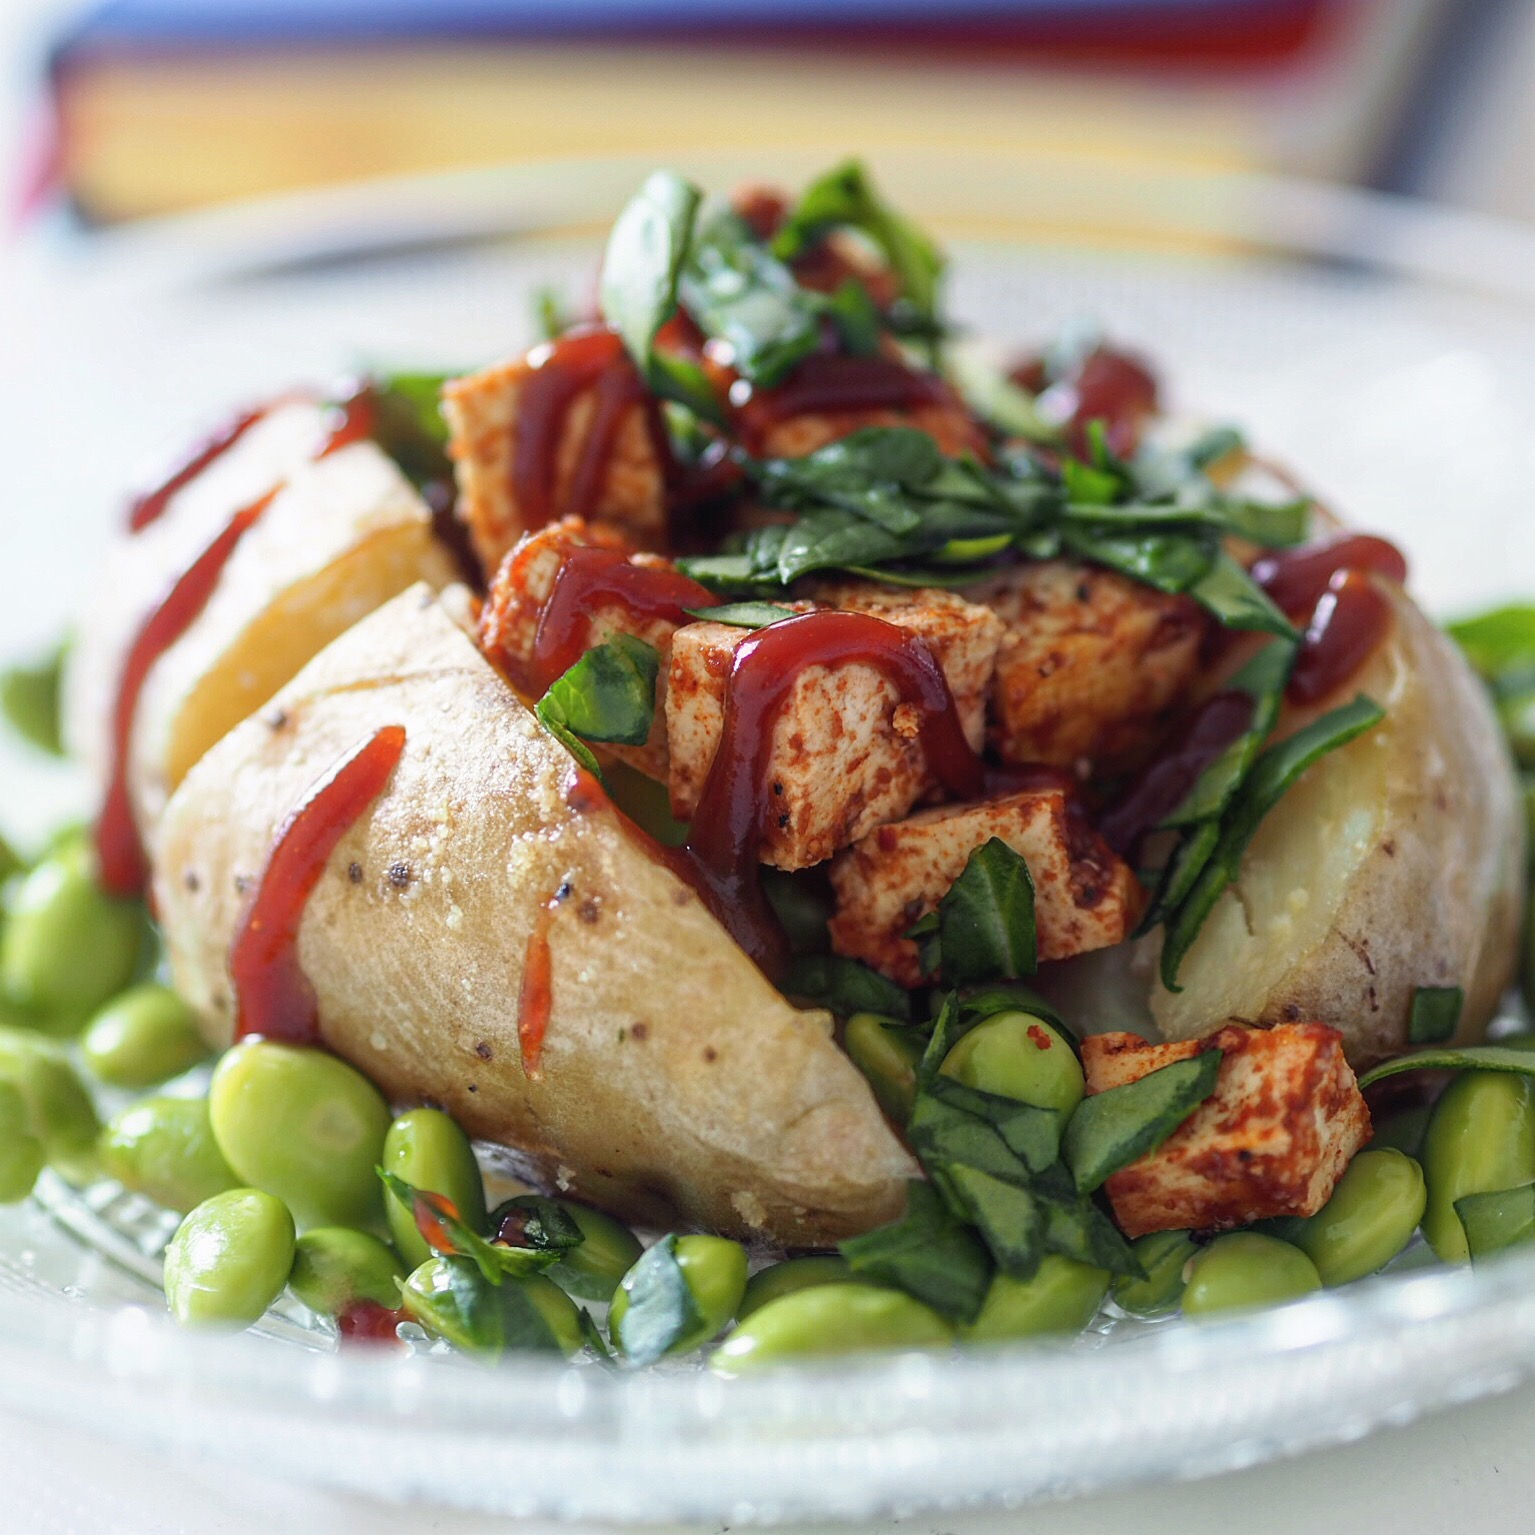
The easiest way to make tasty tofu, using bbq sauce and not much else! Pair it up in a salad or a spud for maximum taste bud party.


TOFU NUGGETS


Chicken nuggets is so last year, try these tofu nuggets instead.
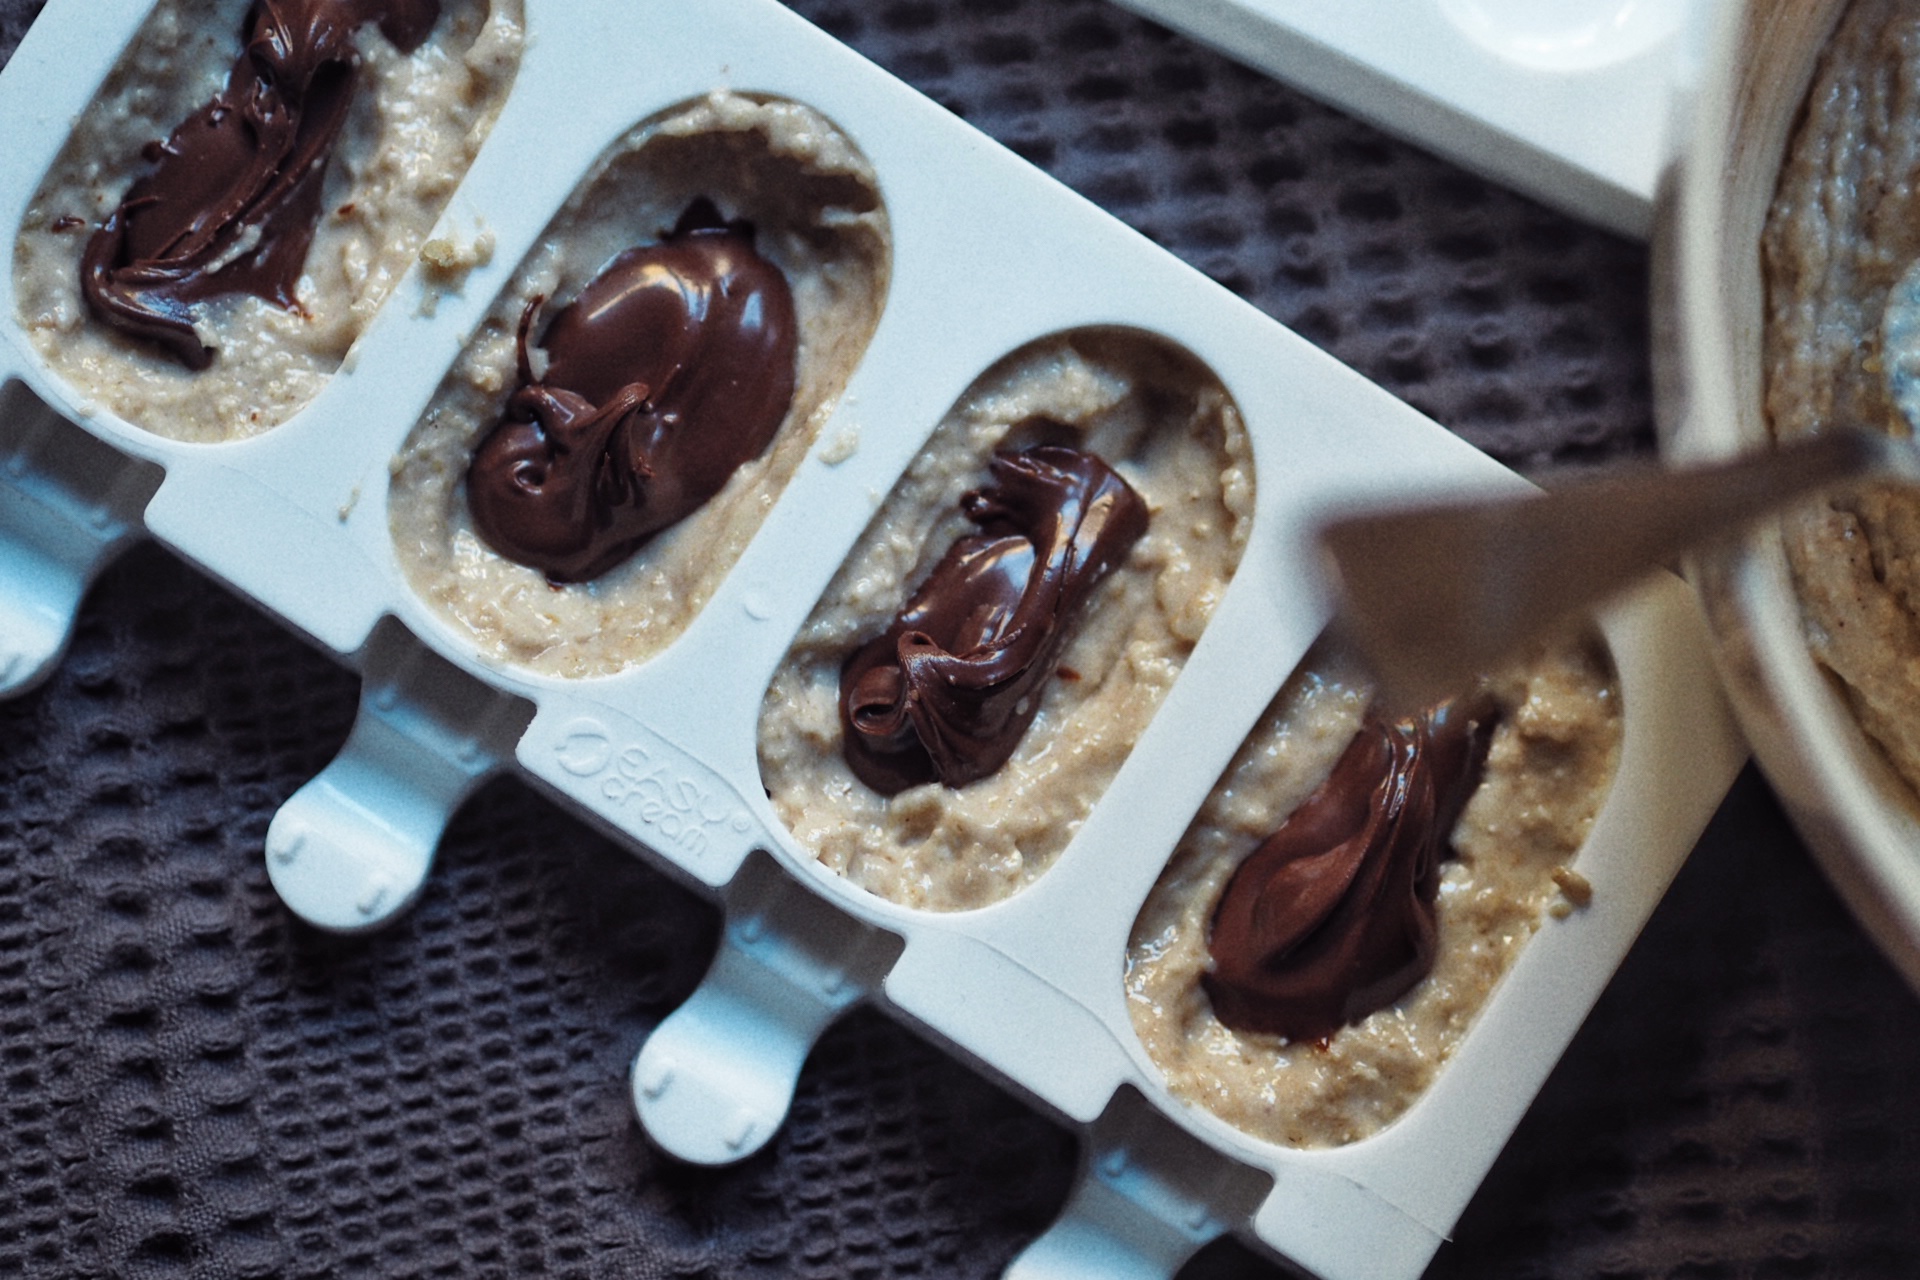

VEGAN BANANA BREAD

vegan banana bread


Would you believe us if we said a can of pop can replace an egg? This recipe shows you how.


BASIC VEGAN PANCAKES


The simplest and tastiest pancakes you’re ever gonna make! A firm favourite amongst our followers.


We hope these recipes inspire you and remember: even if you swap ONE meal a day to a Vegan meal… you ARE making a difference.


Join us with your feedback #WorldVeganDay \ @themusclebakery \ @themusclebaker


For 20% off Bulkpowders use code: MUSCLEBAKERY20
For 5% off iHerb use code: JCB887


HAPPY VEGAN DAY 🌱