Lactose-Free Stuffed Courgette πŸ₯’

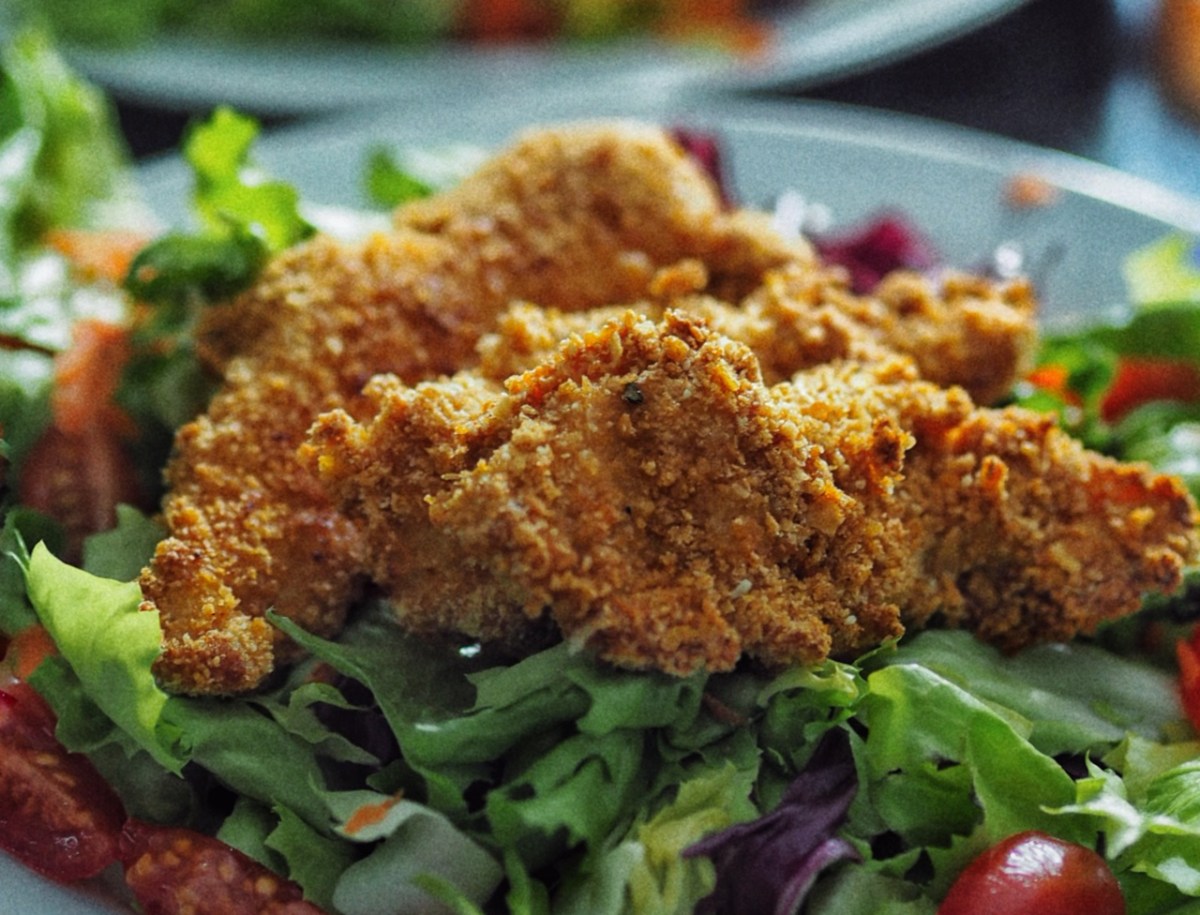
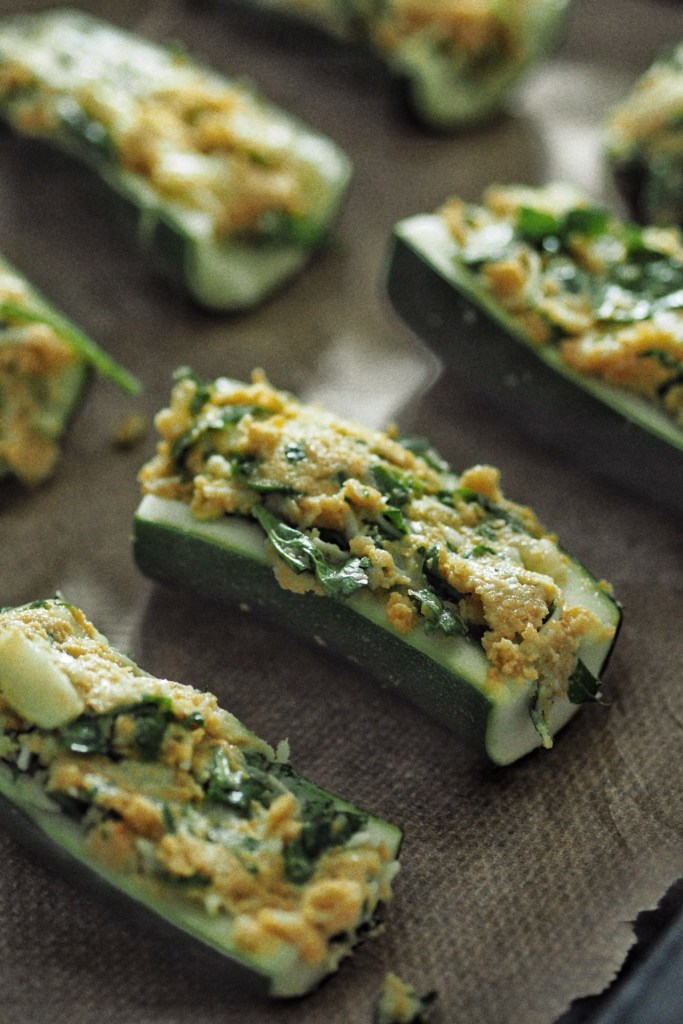
Also known as calabacines rellenos.


Currently on a mission to help my boyfriend with his diet, which at the moment means avoiding lactose (the sugar in dairy). He loves his grans stuffed calabacines so I thought I’d try a lactose-free version. Heres how:


Ingredients:
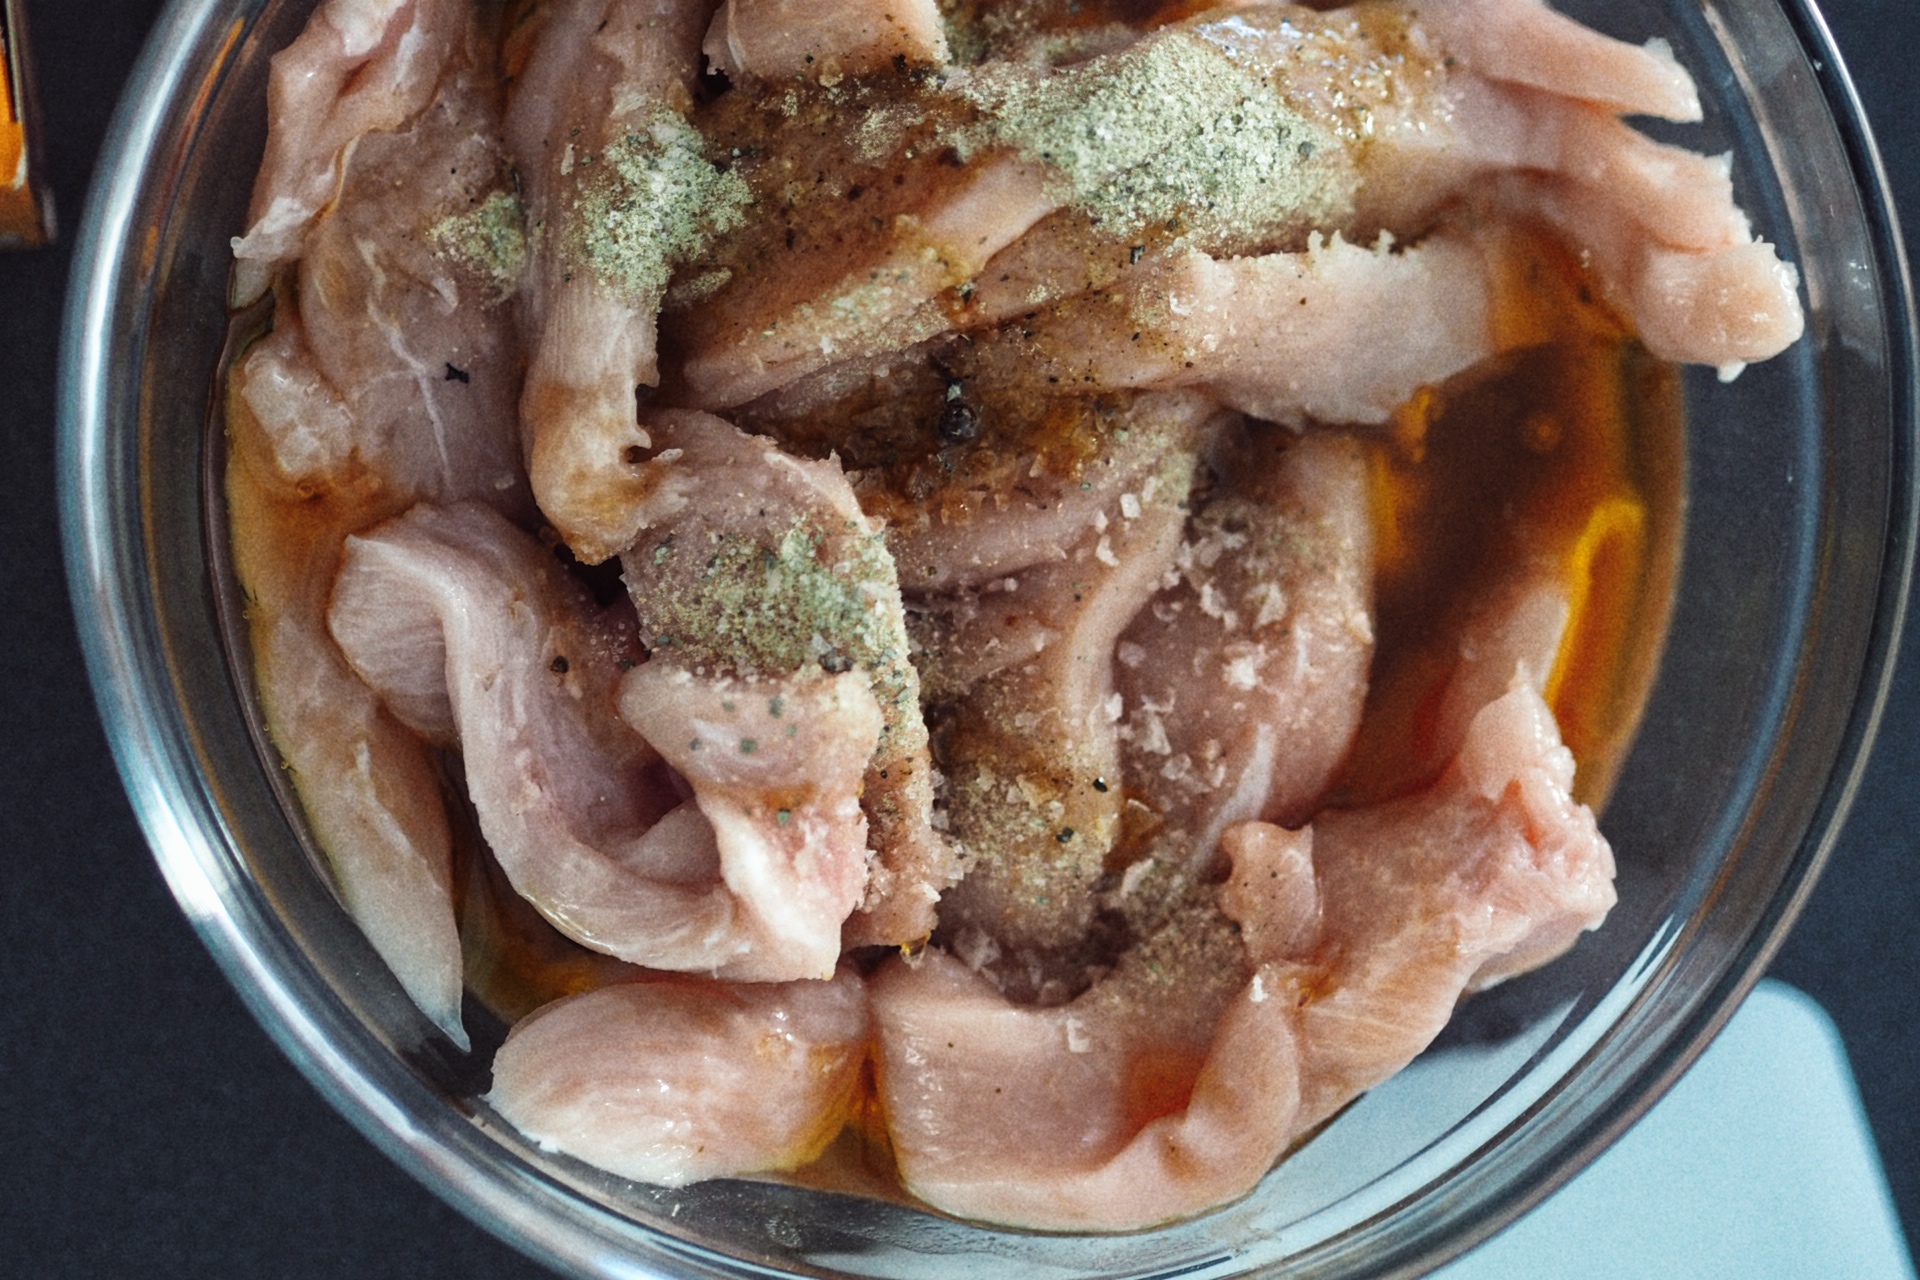
2x large courgettes (sliced lengthways and in half to give you 8 pcs)
Handful of chopped spinach
3 Egg whites
3/4 Cup gluten-free breadcrumbs
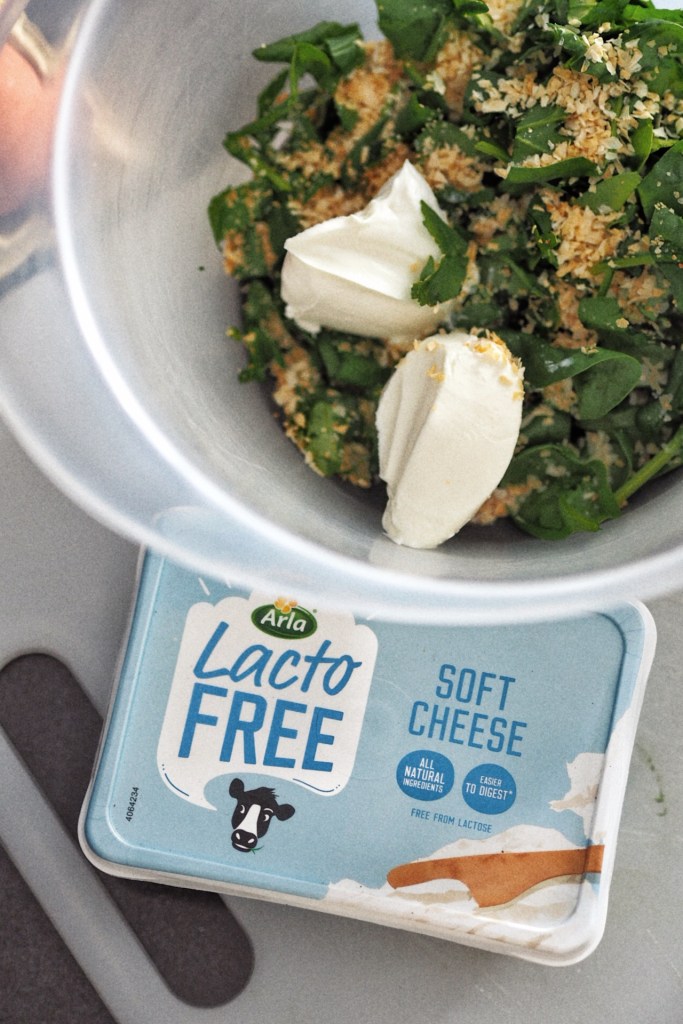
2 Tbsp lactose-free soft cheese
1 Tbsp onion granules
1 Tsp garlic granules
120g Lactose-free cheddar (grated)
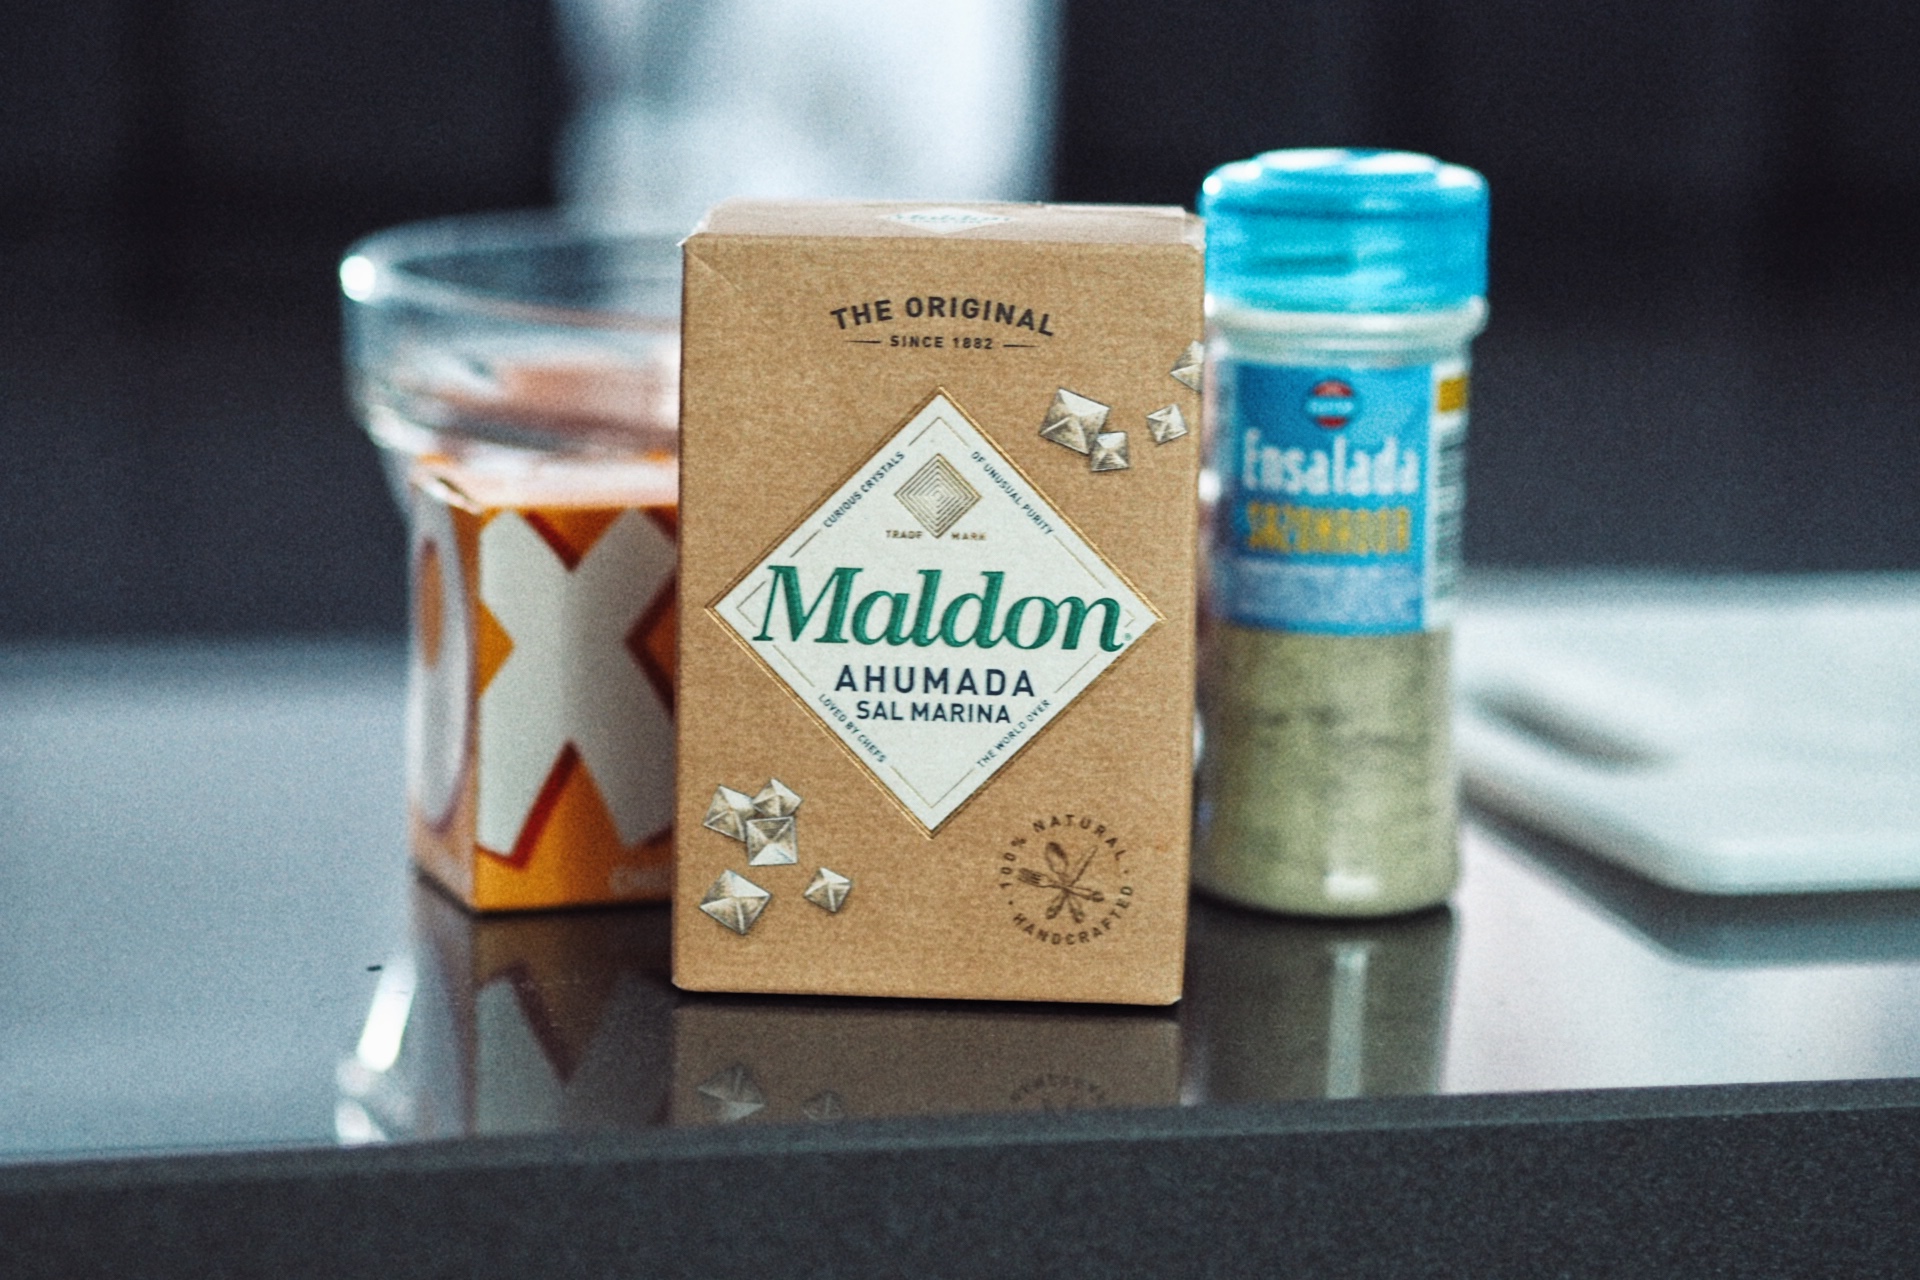
Salt & Pepper

Method:
You’ll need to cook the courgettes first, you want the outer skin to be softer and you’ll be using the flesh for the stuffing mix.


Courgette Img


You can do this two ways: the easier way is in microwave. Place courgette pieces in a microwave safe dish face down in approx 1inch of water, heat in intervals of 1 minute until the flesh is soft enough to scoop out. Alternatively, the second way is doing it in the oven – this takes a little bit longer.

Then, the rest is easy. Scoop the flesh out of the courgette and mix into a bowl with all ingredients except for cheddar. Spoon back into the hollowed courgettes and sprinkle with grated cheddar and cook in a pre-heated oven at 170 Degrees C for approx 10-15mins until cooked through and cheese has melted.


Fun fact: Courgettes have a high water content making them a dieters best friend as they contain very few calories! Whats more they aid healthy digestion AND are high in antioxidants.

Perfect to prep in advance and have as snacks or a side dish with main meals. I calculated that each piece has approx 130 calories, macros may vary depending on brands you use but not bad huh?


Stuffed Courgette Img


Hope you enjoyed this recipe, don’t forget to tag and share us if you try it πŸ™‚

Find me on instagram for more recipes, tips and nonsense.

Lower-Fat Satay Curry πŸ›

I started off with every intention to make a stir-fry but the can of coconut milk lurking in the cupboard wanted otherwise.


This recipe is an amended version of this Chicken Satay, the difference would be in the marinating of the chicken and addition of red peppers (which was a sublime addition by the way).


Ingredients:
500g Chicken Breast (sliced thinly or cubed)
1 Tbsp Garam Masala
1 Tbsp Turmeric
1 Tbsp Garlic Powder
Drizzle of olive oil
1 Chicken stock cube
Large red pepper
1 Can of light coconut milk
3/4 Cup peanut powder
Salt to taste

Method:
In a bowl add chicken, garam, turmeric, garlic, olive oil, 1/2 crumbled stock cube and a sprinkle of salt and massage it all into the chicken pieces using your hands. Set aside.

Prepare two pans with a drizzle of olive oil, one will be for chicken which will need to be large and the other is to make your red peppers separately.

Slice the red pepper into thin strips and cook in a pan on medium-high heat with the other half of the stock cube.

Heat up larger pan until hot and cook chicken on medium-high heat until chicken has cooked over (and you can’t see any pink bits), pour in coconut milk and peanut powder and reduce heat to a simmer.

Once your red peppers have softened (I let them brown a bit, until they were a bit chargrilled) you can fold them into chicken curry.

Leave simmering for approx 10 mins.

Serve with rice, quinoa or some salad – delicious either way! The sauce is to die for and we even grabbed some bread to dip in the sauce… mmmm.


Hope you enjoy it! Don’t forget to share it with me, I love to see you making these recipes πŸ™‚

Don’t forget to like and subscribe to this blog and receive all recipes direct to your inbox OR you can follow me on instagram for all things foodie.

Easy Chia Pudding

Chia seeds are jam packed with nutrients so imma add them to everything and nobody is gonna tell me otherwise.

Seriously though, chia seeds are the powerhouse of the seed family: packed with antioxidants, fibre, protein and omega-3’s… you really can’t go wrong by adding them to your diet. For me, they really help with regulating my digestion and I won’t go a day without having them – mostly adding them to porridge and yoghurt.

Chia seeds are one of the most fibre dense foods available, specifically soluble fibre. What does this mean? In the same way that chia seeds create a gel when mixed with water, the same process happens in your digestive system; they absorb water to form a gel and in turn soften stools for easier passage.

Anyway, heres the recipe – give your body the love it deserves:

Ingredients:
160g Non-fat greek yoghurt (I used Fage brand)
2 Tbsp unsweetened almond milk
1 Tbsp chia seeds
Flavour drops of choice or vanilla extract
+ toppings of choice

Method:
Not much to it, just mix it all together until combined (without toppings), pour into a glass or bowl and refrigerate for an hour (or until you can turn the bowl/glass upside down without it falling out).

Then, top with what you like πŸ™‚


I topped mine with some Malt-ish crumbles, sugar-free chocolate hazelnut spread and strawberries 😍


Hope you enjoyed this recipe, don’t forget to follow the blog to receive updates directly to your inbox or you can follow me on Instagram for all things foodie.


Cheesecake-filled Easter eggs 🐣

Easter eggs but make them macro-friendly.

Easter eggs isn’t the problem, eating them in moderation is. I just want the whole egg. You know? So, with these homemade ones i can at least eat the whole egg and its still within ‘moderation’ hehe plus they look super cute AND a higher in protein.

Heres how:
100g Chocolate of choice
1/4 Tsp coconut oil
200g Light soft cheese*
10g Low-Sugar chocolate hazelnut spread
20g Whey protein powder – choc flavour
4 Drops of hazelnut flavdrops
2 Drops of white choc flavdrops
+ toppings of choice

*The lightest option available is Philadelphia brand ‘lightest’ however I used generic supermarket branded soft cheese.

To make a vegan egg alternative, use vegan cheese spread (any brand will work) and the best protein powder I would recommend is choc soy protein, like this one.


Note: if you don’t have the flavdrops don’t worry it won’t change the texture of this recipe just the taste. You can add more hazelnut spread for authentic ‘bueno’ taste or you can just add any essence/ flavouring drops to sweeten.


Method:
Melt chocolate with the tiny bit of coconut oil – I do this in microwave but if you don’t have a microwave place chocolate and coconut oil in a glass bowl over a saucepan with boiling water. Some chocolate brands won’t require using coconut oil, but others might be thicker and need a bit of oil for it to spread easier.

Using an easter silicone mold, spread a layer of chocolate into each cavity and freeze a couple of minutes until solidified.

In a bowl, mix together remaining ingredients and whisk until well combined. Pour into your chocolate egg shells (still in mold) and refrigerate 15-20minutes.


Lastly, top with whatever you like – I used Malt-ish crumbles, strawberries and a cheeky white choko bon. Like having an easter egg and delicious dessert rolled into one, with the added bonus of each egg coming to approx 260 cals (inc toppings).


Hope you enjoyed this recipe and don’t forget to follow this blog to receive updates directly to your inbox or follow me on Instagram for all things foodie 😊

Get discounts on IHerb with my code (multiple use) : JCB887

Recipe: Sweet Pizza πŸ“

Idk, its like a pizza pero sweet.


Halfway into making breakfast muffins for my boyfriend I realised I didn’t have a muffin tray to bake them in and so, sweet pizza was born. Honestly, it felt like the most fitting description.

Made with oat flour, whey and egg – a simple and versatile recipe which you can make when you fancy something cakey, can prep in advance or even make into muffins (like i failed to do).


Heres the recipe:


Ingredients:
1 Cup oat flour (or ground oats)
1 Scoop whey protein*
1 Tsp baking soda
1/2 Cup oat milk (or milk of choice)
1 Egg (or 2x egg whites)
1/4 Cup maple zero syrup
1 Tsp vanilla
1 Tbsp agave nectar
*You can omit this completely, however the whey protein will give it a sweeter flavour so you will want to add some more sweetener – I would recommend a powdered stevia or xylitol).

Method:

Pre-heat oven to 170 Degrees C.

Chuck all your ingredients in a bowl and mix until well combined.

Line a round tray (I only had one size which is approx 10inch) with greaseproof baking paper and pour your mix into it. Spread to the edges with a spatula – it should spread enough.

Sprinkle choc chips into batter (optional).

Bake for approx 10mins, until baked through the centre.

Remove from oven… I would say leave to cool, but is anyone ever patient enough to do that? Melted chocolate chips > not melted chocolate chips. YGM?

Spread your desired toppings; I used peanut butter, strawberries and white choc drizzle.


Yields 4 slices and approximately per slice (no toppings) was: 162 cals | 3.2F | 17.4C | 11P however macros may vary depending on brands and measurements each person uses.


Hope you liked this recipe, follow the blog to receive blogposts directly to your inbox OR you can follow me on instagram for recipes, reels and nonsense πŸ˜›


5% discount on iHerb using code: JCB887 (multiple use code).

Recipe: Peanut Pancakes πŸ₯œ

10pm is a great time to make yourself pancakes, right?


After eating light all day, 10pm came along and I was hungry – cue pancakes. As with most recipes, i chucked loads of ingredients in a bowl and hoped for the best.


This was the outcome:


Ingredients:
6 Tbsp peanut powder
(They also sell this one in Morrisons)
20g Whey protein powder
(I recommend the one in shopping list below OR this one by Bulk)
2 Tbsp xylitol (or granulated sweetener of choice)
30g Ready Brek porridge oats
1 Tsp baking powder
Pinch of salt
3 (L) egg whites
3 Tbsp milk of choice


Shopping list here.


Method: Just like I did, chuck it all in a bowl and mix until everything is combined.

Leave your mix to a side (let the oats and peanut powder soak in) and heat a non-stick pan to medium heat. Be patient and wait for it to properly heat up, don’t be tempted to increase heat because this is just going to burn your pancakes. Trust.

Then, using a low-cal spray oil, make your pancakes. Pour table-spoonfuls of mix onto pan – leave to cook several minutes and flip. Repeat for entire mix.


Stack them up and enjoy! With some ‘Better than Snickers Spread’ maybe? I added some berries too! How will you have yours?
Hope you enjoy them, don’t forget to tag/share if you make them πŸ™‚

Exclusive discount on iherb with code: JCB887

Recipe: Caesar Salad Sauce (+ vegan subs) πŸ₯—

Did you know Caesar sauce usually has anchovies? I didn’t and let me tell you I WAS SHOOK.


Dont get me wrong, I have nothing against anchovies but I don’t like them and just knowing that they reside in Caesar Salad sauces – I just can’t do it. So, I made up my own recipe, which happens to be healthier and high in protein too. FTW.


Heres how you make it (with vegan subs):


Ingredients:
4-5 Tbsp non-fat greek yoghurt
For vegan option use Alpro ‘Greek’ style
1 Tbsp Hellmans really light mayo
For vegan option you can use vegan mayo OR more yoghurt
10g Dijon mustard
40g Parmesan
For vegan option use Violife ‘Parmesan’
3 Tbsp milk of choice
1 Tsp garlic powder
1 Tsp olive oil
1 Tsp lemon juice
Salt & pepper to taste

Method:
Theres not much to it, put all your ingredients into a blender and blitz until smooth. Alternatively you can use a hand held blender too.

Note: add more milk if you prefer it runnier.


I made my salad with these delicious Chicken Goujons, pan-fried cooked ham (tastes like turkey bacon and is the best bacon hack you’ll ever try), crumbled melba toast and goats cheese cubes. Was absolutely delicious and felt like we were having a restaurant dinner πŸ˜›


Dont forget to tag / share if you try it! πŸ™‚


I had shared this recipe previously on my social media so don’t forget to follow me on instagram for more tips, recipes and nonsense.

Recipe: Better than Snickers spread 🍯

Promise, better than Snickers (branded) peanut butter spread…not that it would be hard to make a better one.


I was SO disappointed in the lack of flavour, you would never think a trusted brand like Mars Company would get this sooooo wrong. Its meant to be a caramel flavoured peanut butter with chocolate pieces BUT it tastes of neither. How is that even possible? At first I rated it a 5/10 but it doesn’t even get that… its a 1/10.


I wanted to re-create the spread using supermarket products, so that you could get the same (more flavourful) edition at the same price.


You will need:
1 Jar (label optional)
60g Dates (pitted)
1 Tbsp agave nectar
1 Tsp oil of choice (I used olive oil because coconut oil solidifies, however you can use any you like. You can also add more oil if you’d like to make the spread creamier)
400g Natural peanut butter (100% peanuts)
100g Milk chocolate spread
For a vegan alternative use this one by Plamil.
Sprinkle of salt

Method:
First you have to soak dates in boiling water until they soften. Then, in a high speed blender (or using a hand held blender) blitz together with 100g of peanut butter, agave, oil and sprinkle of salt.

Pour into a bowl and mix together with a spoonful of chocolate spread.

Grab your jar and layer the date mix, chocolate spread and peanut butter until all peanut butter is used up.

Mix slightly and done!


To make this recipe, the cost was approx Β£3-Β£3.50 which is the same price as the Snickers spread. Alternatively you can omit the dates… even the natural peanut butter with chocolate spread is still nicer πŸ˜†

My spread went a bit pasty overnight, this is normal due to the dates – you can blend or mix in more oil and it will go creamy again.

Hope you enjoy it, try not eat it by the spoonful!
Don’t forget to tag/ share if you make it πŸ™‚

Recipe: Healthy Chicken Goujons (Gluten-Free)πŸ—

KFC got nothing on this.


Honestly though, these were SO good! Reminded me of the KFC chicken tenders – dipped in bbq sauce. Except these were nicer! (obviously) and you would never tell they are baked instead of fried. Will happily bet on your kids/ husband/ boyfriend/ girlfriend/ bff/ parent/ grandchild approving this one.


Heres how I made them:


Ingredients:
For chicken marinade:
600g Chicken breast (sliced into strips)
1 Oxo Chicken stock cube (or alternative but i like the taste of oxo)
1 Tbsp Garlic and herb seasoning
1 Tbsp Smoked salt
2 Tbsp Olive oil
For batter:
50g Ground almonds
200g Gluten-free breadcrumbs*
1 Tbsp Smoked Paprika
1 Tsp Smoked salt
3 Egg whites


*Gluten-Free breadcrumbs are usually made up of dried corn, so if you don’t have any handy or can find none at the supermarket you can blitz some cornflakes in a high speed blender, or even tortilla chips (doritos if you’re feeling crazy) as they too are made of corn.


Method: First, you’ll need to marinate your chicken strips. In a bowl, mix chicken with marinade ingredients. For the oxo cube you will have to dissolve it in a bit of boiling water and pour it in. I like to do this ahead of time, say in the morning for an evening meal so the chicken really soaks up the flavours. Alternatively, if you forgot to marinate ahead of time – make sure you leave it at least half an hour minimum marinating.


Once your marinated chicken is ready, prepare a baking tray with greaseproof paper and pre-heat oven to 170 Degrees C.

Grab two bowls, in one add your egg whites and in the other mix the rest of your batter ingredients.


Then, strip by strip dip chicken into egg white mix, then batter mix and place on lined baking sheet. Repeat until all strips are coated.


Note: In this recipe i made half of the chicken and kept the rest for the next day. Half the recipe yielded approx 18 strips.


Bake for 20-25 minutes (different ovens may vary) until chicken is crispy and golden.


*HEART EYES*


They were so good that we ate ALL 18 STRIPS haha, the first few in a salad as seen in pic and then the rest dipped in bbq sauce.

Like I said, willing to bet on EVERYONE loving these!


Don’t forget to share your recipe making with us, we love to see! πŸ™‚

Follow me on instagram for more tips, recipes and nonsense.

Recipe: Peanutella

Most spreads are usually packed with maximum calories (which isn’t a bad thing) but it just means you get less amount for your calories. With this recipe you get to eat MORE for the same amount of calories… now thats winning!


This recipe is best enjoyed immediately but if you prefer making in bulk and storing for future use, note that the coconut oil will solidify – to use again simply heat a little beforehand.


Ingredients:
1/4 Cup peanut powder – approx 25g (I use PB2 brand)
10g Cocoa powder
40g Ground granulated stevia or alternative sweetener
25g Coconut oil (melted)
4 Stevia hazelnut drops* (I used Better Stevia brand)
*You can use any sort of flavour drops, some other favs are Skinny Co or Bulkpowders drops.

Method:
In a bowl mix all your dry ingredients, then fold in coconut oil until combined.

Then spread onto toast, pancakes or whatever else you may fancy.


I calculated about 8 servings, which totals to approximately 54 cals. However, you may get more servings (or less) out of your mix. Depends on your greedy levels πŸ˜›


Don’t forget to tag / share if you try this recipe, we love to see! πŸ™‚


Follow @themusclebaker for recipe video reels and more.

Use code: JCB887 on iherb for exclusive discounts.